Templates Administration
General
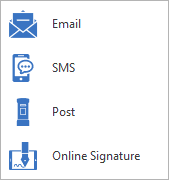
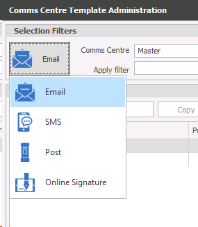
You can create four types of comm’s centre templates within Infinity Email, SMS, Post templates (these can also be attached to email templates) and Online Signature (send digital signature documents via LegalEsign). These allow you to create templates that include merge fields for users to utilise, saving time and avoiding user error.
Online Signature - utilise LegalEsign integration to send documents for digital signature. Go to Online Signatures section for more details
- Go to application menu
- Choose templates
When you first launch the Comms Centre Templates Administration area it will default to Email and the Master Comms Centre.
| Editing Templates | Creating Templates |
| Email Signatures | Advanced Options |
|
Email Signature per User (RECOMMENDED)
|
|
| Email Signatures | |
|
Email Signature per Template |
It will depend on which Comms Centre you are in to which codes are available:
|
Comms Centre
|
Example Emails
|
Notes
|
| Master | Usually setup with just the signature |
There is one Word master and one HTML Master, these are setup as master templates for NEW templates created |
| Candidate Comms Centre | Overview emails (thanks for CV, Get in Touch) | Comms Centre in candidates or in ad hoc lists of candidates |
| Company Comms Centre | Overview emails (intro, marketing) | Comms Centre in Company or in ad hoc lists of Companies / Contacts |
| Meeting | Sending emails to consolidate a meeting invitation | Comms Centre in meetings available for candidate or company records |
| Job | Sending the contact information regarding a job taken | Comms Centre in the job record itself (can only email the contact(s) involved in that job, NOT for candidate mailers) |
| Job Shortlist | Vacancy of Interest emails |
Comms Centre in the shortlist for a job, send out individually or to multiples candidates or to the contact(s)
|
| Interview | Interview confirmations and rejection emails |
Comms Centre within the interview record, send to the candidate or contact(s)
|
| Placement | Offer confirmation, start sheets |
Comms Centre within the placement record, send to candidate or contact(s)
|
| Submit CV | Candidates for you perusal, Hot candidates |
Comms Centre for job CV submit or Spec CV Submit to contact(s)
|


Master templates are the default content for any templates that you create within Infinity. Any new templates that you create will copy from the master template as its starting point and usually consists of the company signature. Changes made to the Master will not change any existing templates, it is purely for future new templates. If regular changes are made to your signature then you should consider hosting signatures within your 365 account or within your email exchange, see signatures section for details.
The master templates are shared across all the different type of email comms centre’s so should not include any merge codes that are specific to any process. E.g. Job reference numbers etc. as they could be used anywhere. Generally just user details or internal company merge codes are utilised.
 IMPORTANT – The master templates should include default merge codes for your company only. This is pulled from the internal company record within Infinity.

You can utilise AI to build your email, SMS and Postal messages, see Infinity CoPilot for more information.
When opening the Templates administration area you will be greeted by the Master Comms Centre this is where the master templates are stored for the Candidate, Company, Meeting, Job, Job Shortlist, Interview and Placement. Setting the master up will mean when creating new templates it will include the contents of this master. It is usually recommended that the master is setup with the company signature.
Master Submit CV Comms Centre is where the master template in stored purely for the Submit CV Comms Centre, allowing you to have a differing master for CV submissions (although you can copy the Master into the Master Submit CV if you wish to set them the same).
- Choose the type of communication you would like to update (Email)
- In the Comms Centre: Make sure that you have Master chosen (as shown above)
- Choose the template editor that you would like to edit, by highlighting it
- HTML editor
- Word editor
- Click Edit
- Make your changes by using the Insert merge code
- See on detail on how to add merge codes
These are pulled from the Internal Company record. See
for more details.
|

|
These are pulled from the User administration area. They WILL NOT come from a contact in the internal company record. See for more details. |
The Important User (Consultant) merge codes are
|

|
These are pulled from the User administration area. They WILL NOT come from a contact in the internal company record. See Create a new User for more details. |
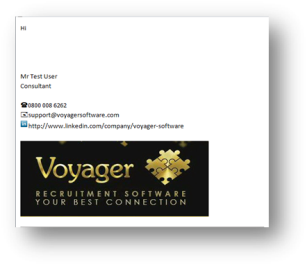
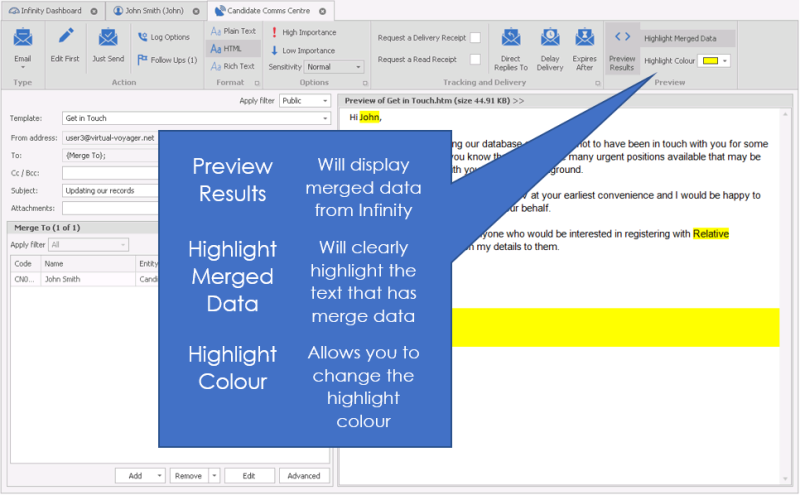
Preview Results allow you to see the merge codes.
IMPORTANT - As all Email comm’s centre templates will use this master (except CV submit) then it is very important to get this master as desired before creating new templates.
Infinity tab
These are the options that are specific to infinity.

Select Email HTML Editor and click on the edit button
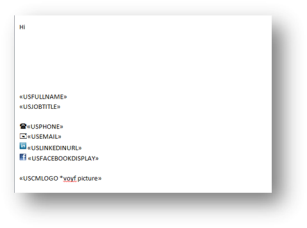
The basic default template will then be displayed, you can edit this or remove this content and input your own signature. Copying and pasting from Word will give mixed results, this is due to the fact that Word has numerous layers to its text, in particular styling which controls the size, type, spacing of fonts.
Once the text is pasted into the HTML template you will need to adjust the line breaks / spacing, using control and enter keys (new line command) to add single line spacing, then use the backspace key to remove any carriage return that has incorrect line spacing settings. Also note that the HTML editor has less font options and therefore it may default to Times New Roman so use the font options to adjust, also note that the font size can be adjusted here (unfortunately there is no size 11).
To access the font options you will need to use the expansion button within the font options:

Setting font options to blank lines is necessary to avoid users having to fiddle around when utilising HTML templates. Due to the nature of HTML you will need to input some text, then set the font options to this text. Using single line spacing, control and enter keys, to then set on subsequent lines. Carefully click at the end of inputted text and use backspace to remove the text entered, ensure you do not backspace more than is required as this can remove the font settings that have been applied.
Images will generally not paste into an HTML template, if it does then it is likely to not function when sending it out. All images should be inserted via the insert image and the image stored on a shared network area but ensure that it has a short path to the image file (i.e. do not put it in a sub folder, of a sub folder of a sub folder) if the path is too long it will not allow you to save the template. Also note that the image should be set to the correct size as it will return to its original size once sent. Ideally you would use the image merge code and have the company logo stored within the internal company record.
You can put hyperlinks into images but you will need to access the HTML code via the HTML Body button:
![]()
locate the image file within the code
<img alt="\\VVDC01\Usersdata\Redirect\trainer.c\My Documents\My Pictures\ScreenHunter_40 Sep. 04 17.02.jpg" src="\\VVDC01\Usersdata\Redirect\trainer.c\My Documents\My Pictures\ScreenHunter_40 Sep. 04 17.02.jpg">
Then input this before this:
<a href="http://WEBSITE URL GOES HERE/">
Then add this </a> after the image line
So finally you will have:
<a href="http://WEBSITE URL GOES HERE/"><img alt="\\VVDC01\Usersdata\Redirect\trainer.c\My Documents\My Pictures\ScreenHunter_40 Sep. 04 17.02.jpg" src="\\VVDC01\Usersdata\Redirect\trainer.c\My Documents\My Pictures\ScreenHunter_40 Sep. 04 17.02.jpg"></a>
Replace the WEBSITE URL GOES HERE with the URL link you desire.
If you have user specific details like LinkedIn/Facebook URL’s then these can be inputted into the User Administration screen. Then you can utilise the merge code for User LinkedIn URL or Facebook URL (or any other field with URL details you require)
Insert the merge code into the template itself, then highlight the merge code, ensuring you get the whole code and no spaces in front or after it, and cut it. Open the HTML body and locate the image file:
<img alt="\\VVDC01\Usersdata\Redirect\trainer.c\My Documents\My Pictures\ScreenHunter_40 Sep. 04 17.02.jpg" src="\\VVDC01\Usersdata\Redirect\trainer.c\My Documents\My Pictures\ScreenHunter_40 Sep. 04 17.02.jpg">
Then input this before this:
<a href="MERGE CODE GOES HERE">
Then add this </a> after the image line
<a href="MERGE CODE GOES HERE"><img alt="\\VVDC01\Usersdata\Redirect\trainer.c\My Documents\My Pictures\ScreenHunter_40 Sep. 04 17.02.jpg" src="\\VVDC01\Usersdata\Redirect\trainer.c\My Documents\My Pictures\ScreenHunter_40 Sep. 04 17.02.jpg"></a>
Then paste the merge code
<a href="«USLINKEDINURL»">
You will see a blue line around the image, this indicates you have hyperlinked the image, the blue line will not show when receiving the email.
Outlook HTML view
As an alternative you can take some HTML code from other sources, like Outlook and paste it directly into the HTML Body area.
Internet Explorer
Save the email as HTML onto desktop and then open the HTML file with Internet Explorer, then select view Source Code. Images will still need to be manually added as above.
Outlook
You will need to setup the command of view source within you Outlook Quick Access Toolbar within a message.
- Double click on an email within your inbox, this may require you to send yourself the desired signature, from the customize Quick Access Toolbar select More Commands:
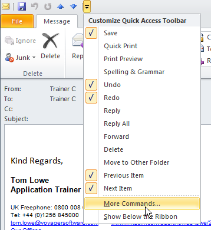
Select All Commands from the dropdown options:
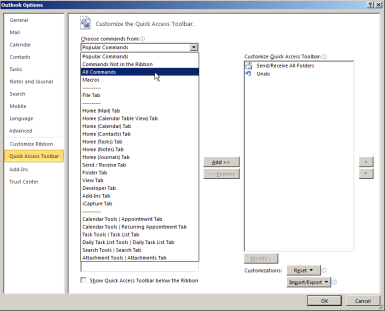
Scroll down the left list to locate view code and select and use the Add button to add to your Quick Access Toolbar:
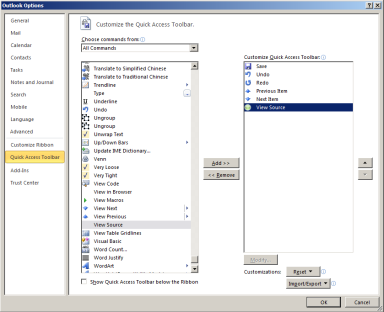
Click OK and you will now have the source button available
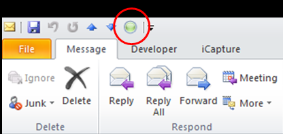
When clicking on the source button you will open the code within Notepad, you can highlight and copy and paste.
NB:- this will not take any images, these will still need to be inserted manually as above.
It is recommended that you copy the HTML Body code rather than just highlighting the content of the template, this ensures all code, including blank lines etc. gets copied.

Click here to save your template.
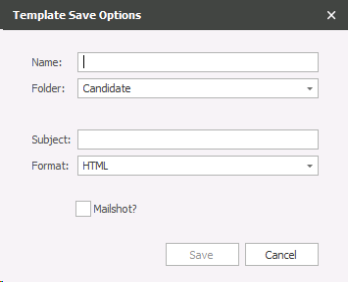
- You will be prompted for a name if this is the first time that you are saving the document (except the Masters).
- Choose which folder within the comms centre the template should be saved within.
- The subject will be the subject line of the email when it goes out.
- The format can be changed to plain text and rich text. Neither of the options is a feature rich as the HTML options, and should only be used if advised by a member of Voyager staff to do so.
- Enter a tick into the tick box if the template will be a mail shot.
IMPORTANT – If a comms centre template is marked as being a mailshot the recipient MUST have a tick in the OK to mailshot tick box against their telecom. The mailshot will NOT send to a recipient that doesn’t have a tick in the OK to mailshot box.

This closes the screen without saving

This is where you will insert the merge codes from within the records into the document. The options that you will see here will be different depending upon which comms centre you are editing.
Think about these fields as being windows to the information in the main database. For example; if you enter the merge code for a name, the document will find the correct name and populate the documents with it.
The merge codes are split into different groups and types.
Each Comms Centre will allow you to access different merge codes, you cannot access merge codes that are not 'linked' to that particular record, for example you cannot pick up job details in the candidate comms centre as a candidate is not 'linked' to any one particular job record. However you can pick up job details in the job shortlist comms centre as the candidate would be shortlisted in the job. Below is a list of groups available within each Comms Centre:
|
Comms Centre
|
Groups Available
|
Radio Button Option
|
| Master |
Merge To Telecoms User User Company User Location |
N/A |
| Candidate Comms Centre |
Candidate Merge To Telecoms User User Company User Location |
N/A |
| Company Comms Centre |
Company Contact Credit Control Contact Invoice Contact Invoice Location Location Merge To Telecoms User User Company User Location |
N/A |
| Meeting |
Meeting Merge To Telecoms User User Company User Location |
N/A |
| Job |
Job Job Company Job Credit Control Contact Job Invoice Contact Job Invoice Location Job Location Job Main Contact Job Reports To Contact Merge To Company Merge To Contact Merge To Location Merge To Telecoms User User Company User Location |
N/A |
| Radio Button Options | Candidate | Contact |
| Job Shortlist |
Job Job Company Job Credit Control Contact Job Invoice Contact Job Invoice Location Job Location Job Main Contact Job reports To Contact Merge To Candidate Merge To Telecoms User User Company User Location |
Job Job Company Job Credit Control Contact Job Invoice Contact Job Invoice Location Job Location Job Main Contact Job reports To Contact Merge To Company Merge To Contact Merge To Location Merge To Telecoms User User Company User Location |
| Interview |
Interview Interview Candidate Interview Company Interview Job Interview Location Interview Main Contact Interview Reports To Contact Merge To Candidate Merge To Telecoms User User Company User Location |
Interview Interview Candidate Interview Company Interview Job Interview Location Interview Main Contact Interview Reports To Contact Merge To Company Merge To Contact Merge To Location Merge To Telecoms User User Company User Location |
| Placement |
Merge To Candidate Merge To Telecoms Placement Placement Candidate Placement Company Placement Invoice Contact Placement Invoice Location Placement Job Placement Location Placement Main Contact Placement Reports To Contact User User Company User Location |
Merge To Company Merge To Contact Merge To Location Merge To Telecoms Placement Placement Candidate Placement Company Placement Invoice Contact Placement Invoice Location Placement Job Placement Location Placement Main Contact Placement Reports To Contact User User Company User Location |
| Radio Button Options | Job | Spec |
| Submit CV |
CV Submit Job Job Company Job Credit Control Contact Job Invoice Contact Job Invoice Location Job Location Job Main Contact Job reports To Contact Merge To Company Merge To Contact Merge To Location Merge To Telecoms User User Company Used Location |
CV Submit Merge To Company Merge To Contact Merge To Location Merge To Telecoms User User Company Used Location |
You will need to choose the correct type to find the correct field.
These fields are fields within Infinity that are text. I.e. contain words, either manually typed or from a list.
Default text when missing: Here you will enter what you would like Infinity to enter into the document if the field that you have chosen id empty. E.g. Based in could be blank in a candidates record, you may wish to enter UK as the default. This will stop you having gaps in your document. However; if you prefer you can leave the field empty and Infinity will merge nothing into the field.
Put a tick in the Display as hyperlink? Box if you would like Infinity to show the merged information as a hyperlink. When you tick this box you will also be able to choose the text that shows as a hyperlink. E.g. you may include a merge code that is an external link (website), but would like the document to show something different. When setting up phone numbers you can set them as display as hyperlink which will enable the facility to call from an iPhone (other mobile operating systems will enable calling without setting as hyperlink).
E.g. click here to view website
These fields within Infinity are those that are dates and / or time fields.
Default text when missing: Here you will enter what you would like Infinity to enter into the document if the field that you have chosen is empty. E.g. Start could be blank in a candidate’s record; you may wish to enter Immediate as the default. This will stop you having gaps in your document. However; if you prefer you can leave the field empty and Infinity will merge nothing into the field.
How date / time as: Choose here the format of the date / time you would like to display.
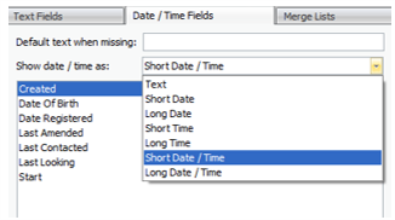
Text = 01/01/2012 12:00
Short date = 01/01/2012
Long date = 01 January 2012
Short time = 12:00
Long time = 12:00:00
Short Date / Time = 01/01/2012 12:00
Long Date / Time = 01 January 2012 12:00:00
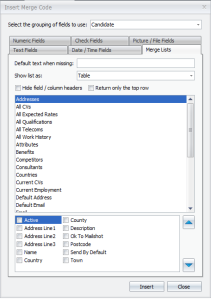
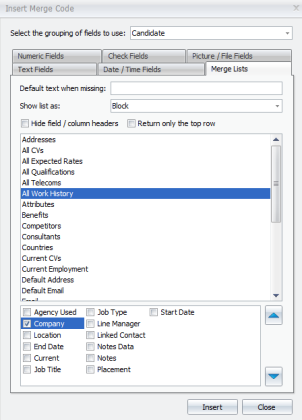
Merge lists are lists of information that could be included against a record. E.g. all telecoms, attributes or quals & certs.
Default text when missing: Here you will enter what you would like Infinity to enter into the document if the field that you have chosen is empty. E.g. benefits could be blank in a candidate’s record; you may wish to enter none as the default. This will stop you having gaps in your document. However; if you prefer you can leave the field empty and Infinity will merge nothing into the field.
Show list as: Text, Block or table. This is the format that the information will be displayed in the document.
Text
Will display the data as a line of text:
Company,Current,Job Title
Voyager software, Current: No, IT Support
Voyager Software, Current: Yes, 3rd Line Support, QA, Functional Spec Writer
Voyager software, Current: Yes, Sales Manager
Block
Will display the text as a block (new line per line of data):
Company: Voyager software
Current: Current: No
Job Title: IT Support
Company: Voyager Software
Current: Current: Yes
Job Title: 3rd Line Support, QA, Functional Spec Writer
Company: Voyager software
Current: Current: Yes
Job Title: Sales Manager
Table
|
Company |
Current |
Job Title |
|
Voyager Software |
Current: No |
IT Support |
|
Voyager Software |
Current: Yes |
3rd Line Support, QA, Functional Spec Writer |
|
Voyager Software |
Current: Yes |
Sales Manager |
Choose if you like to hide the headers by entering a tick into the Hide field/column headers. If you choose to leave this ticked, Infinity will include the header in the merge field. Do not show the headers if you have chosen to show the merge code as text.
The tick box for return only the top row will only return the first row of data.
At the bottom of the screen you will see different options that will enable you decide what levels of detail you would like to see when you use the highlighted merge field. In this example we have All Work History highlighted, we can then choose if we want to include the company name, location, end date etc. in the information that we merge into the document.
Note - The arrows on the right of the tick boxes enable you to change the order of the fields and the way that they show on the document you create. This will be particularly useful when making sure that addresses come through in the correct order.
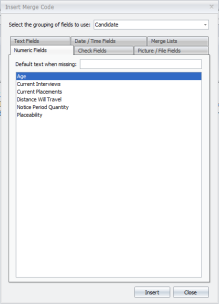
These are the fields that will be a numeric field in Infinity. It may be manually entered, or chosen from a drop down list.
Default text when missing: Here you will enter what you would like Infinity to enter into the document if the field that you have chosen is empty. E.g. Notice period could be blank in a candidate’s record; you may wish to enter immediately available as the default. This will stop you having gaps in your document. However; if you prefer you can leave the field empty and Infinity will merge nothing into the field.
These are fields that are tick boxes in Infinity.
The option to tick in the Display as checkbox? Enables you to choose if you want the information to be shown as a tick box or as a yes / No.

The image above shows the option to have the information shown as a tick box
E.g.: Full Time □

The image above shows the option to have the information shown as a yes or no.
E.g.: Full Time No
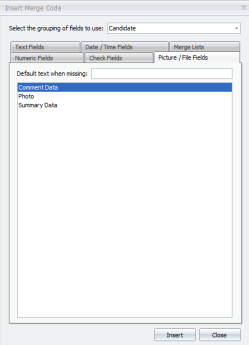
Infinity enables you to merge picture and file information into a document. Choose an option from here to complete this option.
Default text when missing: Here you will enter what you would like Infinity to enter into the document if the field that you have chosen is empty. E.g. Summary data could be blank in a candidate’s record; you may wish to enter a generic sentence as the default. This will stop you having gaps in your document. However; if you prefer you can leave the field empty and Infinity will merge nothing into the field.
This drop down option at the top of the screen enables you to choose which group of merge fields you will be viewing,
You will only be able to see the relevant merge codes pertinent to the grouping you have chosen. The grouping is further affected by the comms centre template that you editing, please see the merge codes section for more details
Clicking the Highlight Merge Fields enables you to identify the merge codes within a document,

Clicking the invalid merge fields will check the template for any merge fields that are not appropriate for the template

This option enables you to see the merge codes merged into the document as it will look when sent. This is useful for checking when you created a new comms centre template.

Click the send test option to send an email to yourself to view the finished document, Infinity will ask you to choose the email address that you’d like the test email to be sent to. Click Send.
![]()
Please see merge codes examples section for most popular merge fields used within each of the Comms Centres

Use the options in the Home tab to format your document.
The clipboard, Insert, Font andparagraph group of the ribbons are the normal Microsoft options.
Import enables you to import a file (probably a picture) from elsewhere on your network. Click here and browse to the correct file, click open to insert.
Edit HTML Body opens the document directly in HTML.
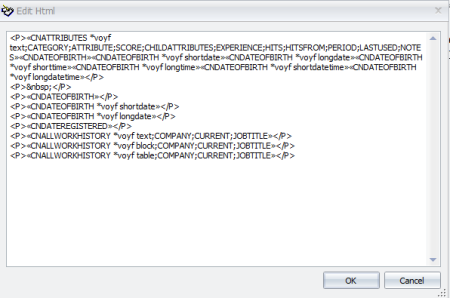
You are able amend the HMTL code here
You are able to change the colour of the background and foreground
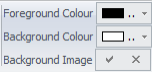
To enter a background image into the template, click the tick to the right of Background image and browse to the image, click Insert.
It is here that you will create the templates that are available from the different comms centre in the database.
To create a template
- Go to the application menu
- Choose Templates
![]()
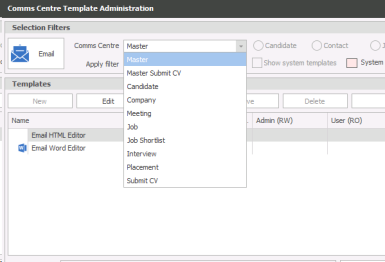
The image above shows the screen that will open
- Choose the Comms centre that you would like to create the template in, see Merge Codes section for more details on selecting the appropriate Comms Centre
Master: This is the master templates as described in
Candidate: Available from the candidate records (one or many)
Company: Available from the company records (one or many)
Meeting: Available when meetings are arranged
Job: Available from the Job record
JobShortlist; Available from the shortlist for a job
Interview: Available from an interview record.
Placement: Available from the placement screen
SubmitCV: Available when submitting CV / summaries / builders
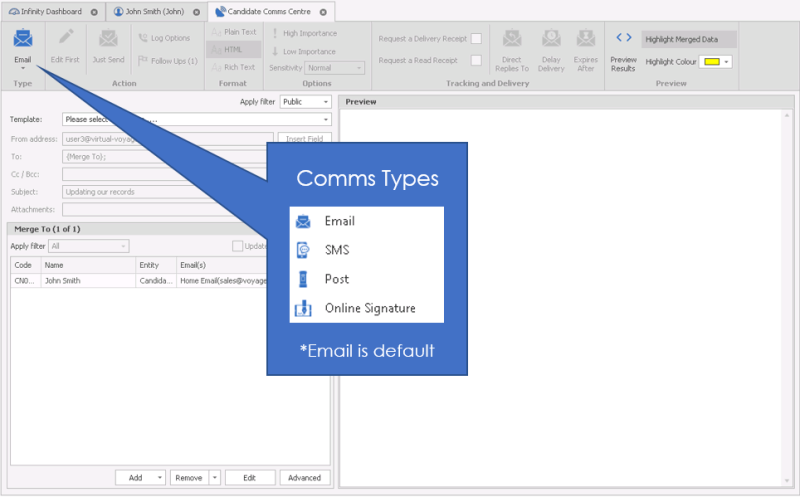
- Choose the type of template to create
Email: Create a template that will be sent as an email. Use the HTML editor to create these types of template
SMS: Create a template for sending in a text message. Use the HTML edit to create these
Post: Create a template that is designed to be printed and posted. You can use the Word editor for this type of template, but it is advised that you use the HTML editor if possible. Using the HTML edit will mean that there is less chance of compatibility issues with the document when it merges.
Online Signatures Create a LegalEsign template to send signature documents to candidates or contacts, see Online Signature section for more details:
-
 ClickNew
 - ChooseTemplate
NOTE – Create choose new folder here for managing your templates into folders
Choose the document that you would like to create, usually Microsoft Word, due to familiarity, HTML for quick text based (unless you have HTML code knowledge) and the option to import from file if you have already created the HTML document externally of Infinity (note importing can cause formatting changes, this is due to the numerous ways HTML is translated by different applications).
- Choose Word
- Click OK
- Type your template into the word document that opens.
- You can copy and paste it if you have already created the template elsewhere.
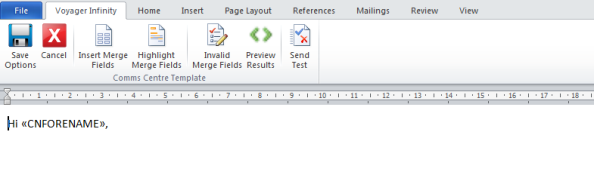
- Click on the Voyager Infinity tab and click Insert merge fields
- Insert the relevant merge codes as described in
- If you would like to view the merge code, click Preview results on the tool bar
- When you are happy with the template click Save options
- Choose Voyager HTML Editor
- Click OK
- Type your template into the HTML document that opens.
- You can copy and paste it if you have already created the template elsewhere.
- Click Insert merge fields
- Insert the relevant merge codes as described in
- When you have finished, click the Home tab in the editor
-
- Change the format as necessary to make the template look correct
- Spell check is the toolbar at the top of the screen
- Use the Edit HTML body option to make changes to the HTML code – Advanced users only
See section on Master HTML for more detail on how to format the HTML editor
IMPORTANT – The inserting of merge field in this option is much easier and intuitive. The results will also be more reliable that the Word option
- To the check the merge codes you have added click the Preview results option in the Voyager Infinity tab
- When you are happy with the template, click Save options
- Click import from file
- Click OK
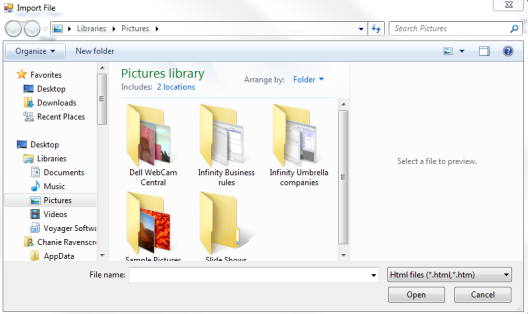
IMPORTANT – You will only be able to choose compatible documents. I.e. if you are creating an email template, you will need to choose an html or htm document.
- Find the correct document
- Click Open
- ClickSave
- You can then reopen and then edit the template See for more detail on this
Save options

Give the template a name in the Name: field
If you’d like to put the template into a folder choose it here
If the template is an email, enter the subject line in the Subject: field
The format will default to the type of document that you have created, but you can change it here if necessary
Enter a tick in the Mailshot? Tick box if the template is designed to be sent to many recipients at the same time.
- Click Save
See General Settings for information on setting up SMTP credentials
You are able to set emails to default to send via SMTP, this avoids emails going through exchange, doesn't copy the email being sent into Sent Items and can be a useful alternative when sending large amounts of messages (like Newsletters or Sales messages). To set a template to SMTP you should select the template and then click on the Insert Field button and set to Email Other:
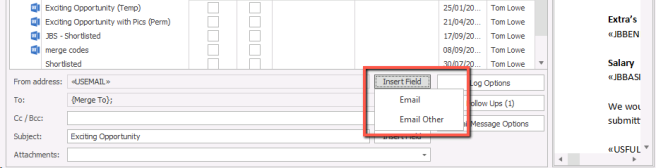
Please note when using SMTP some exchange options and features will not function, for example Delayed Delivery and Save in Sent Items
Not currently implemented
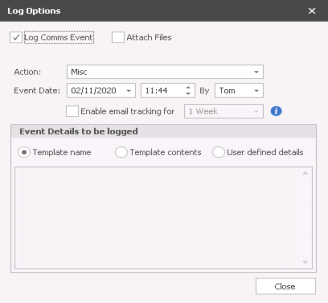
The log options are important to make sure that you get correct. These are how you would like Infinity to record the actions of sending the template.
The options that you choose here will be the default that users will use. It is likely that they will not change these options; however they can if they have the access rights to do so.
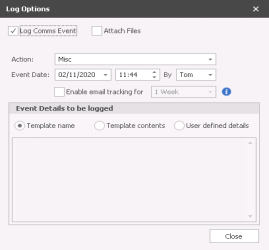
Log comms event: Enter a tick here to log an event - Recommended
Attach files: Enter a tick to attach any files with the template
Update last contact: Enter a tick to update the last contacted date on the record. This will depend of the type of communication
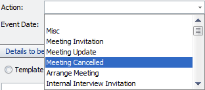
Action: Choose the applicable action from the drop down list
The templates that are available will be specified by the System Administrator, more information can be viewed within the template administration section (NB: - you will require permissions to add or edit templates).
If you have set default templates in your user options area the comm's centre will automatically default to that choice first.

Click the Comm's centre icon 
Make sure that your chosen delivery method is set to email (default)
Choose the template that you would like to send by click on the drop down box next to Template:
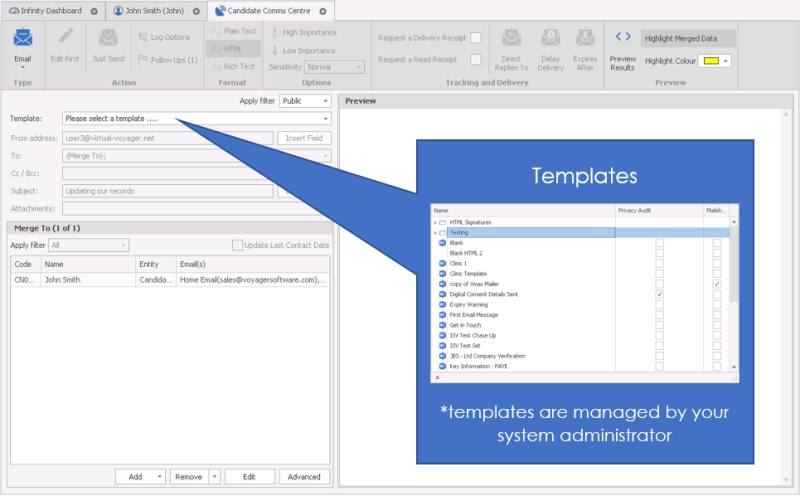
When you choose the template that you’d like to send from the list, you will notice that the template shows on the right hand side of the screen. You are not able to edit the template here but you can preview the merge codes, use Preview Results
If you’re happy with the template (and its settings), click Just Send.

Click "Continue" to confirm
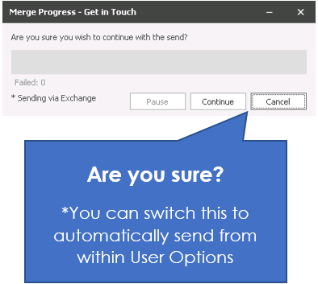
Cancel – Goes back to the previous screen for you to make changes, or close without sending.
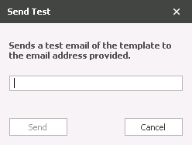
Send Test The placement Comms centre has a ‘Send Test’ button, from the ‘Edit First’ screen. This is designed for you to test the comms centre, but also allows you to send a document to a user outside of Infinity, just type required email address:
NB: - Send Test utilises SMTP not Exchange so may not be recorded in Sent Items

This could also be used to send a ‘Placement Form’ to your accounts team.
Test emails can contain:
• From Email Field
• Email Subject
• Email Contents
• Attachments (including merge-able)
An event is not logged, as there is no Candidate / Contact in Infinity who received the message.
The email is sent either by Outlook (if exchange sync is configured) or by SMTP (using the ‘email other’ option)
However if you want to make changes to the template before it goes. You should make the necessary changes on the left hand side of the screen to the cc / bcc, subject line and attachments
NB:- cc / bcc if you Add a colleague or an email address that is already on the system the email will be recorded in that record as well as the record you are sending to, unless they are excluded, see your system administrator for more details
Adding Attachments
NB: - You can have attachments automatically attached to emails, please speak to your system administrator or click here to view template administration content
To add any attachments, click on the drop down box next to the attachment.
Click Add and browse your computer as normal to find the correct attachment. You are also able to attach a postal template to the email template, allowing you to have merge fields within the attachment.
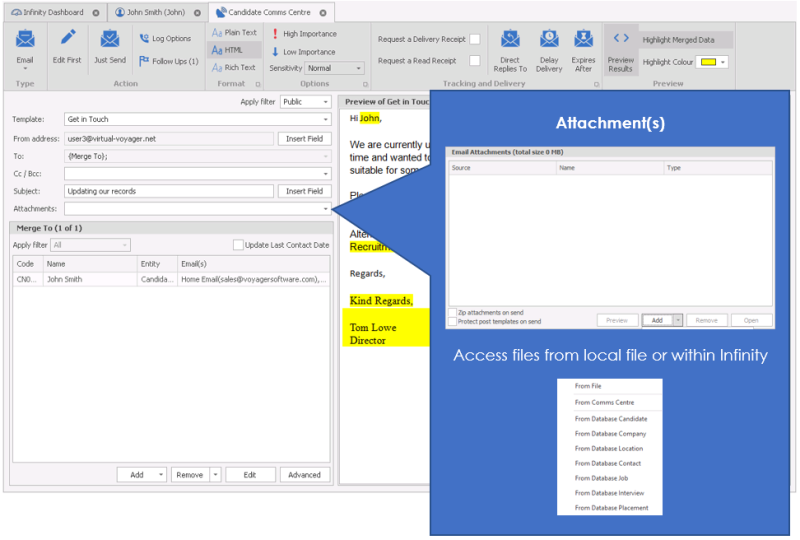
Put a tick in the box to zip attachments on send together, this will compress the files, reducing the size of the attachments.
Put a tick in the box to protect the Word postal templates on send
 Suggestion: Large attachments should be Zipped on sending. This means that the recipient’s mail box is less likely to reject your email because it’s too large.
Click remove to remove an attachment, and Open to open the document to check it. This may be useful if the template has an automatic attachment associated with it to check the documents before sending. Any changes you make to an attachment will be saved for this send.
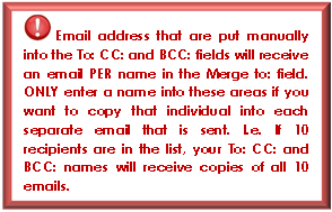
To send a copy of the email to another recipient use the To: BCC: and CC: Fields. This will not include them in the mailshot (i.e. merge their details), but will send them copies of the emails that are sent.
You can also add a colleague to the CC / BCC section, once you have selected your template click into the cc/bcc field and select add, then various recipient options will appear. Select colleague from the list and press OK your colleagues will appear for you to select from.
NB:- cc / bcc if you Add a colleague or an email address that is already on the system the email will be recorded in that record as well as the record you are sending to, unless they are excluded, see your system administrator for more details
To include another merged email to another recipient, click Add at the bottom of the screen and use the find option as described in the previous section. This will automatically send the email to this recipient, with their details, without the need to add them to the To: field
Remove recipients by highlighting the relevant line and clicking Remove
Edit enables you to make a change to the email address if you notice that it is incorrect
If a recipient doesn’t have an email address showing at the bottom of the screen they are likely to not have been ticked as Ok to mail (However the mailing template may have been created as a mailshot template and therefore requires Ok to mail to be ticked) However the mail to. You will not be able to send the email until you have told Infinity which is the correct email address or Privacy Audit is blocking sending until Consent or Legitimate Interest process has been completed.
- Click the Advanced button under the email address to find the correct email address. Here you will see a list of email addresses that have been marked as default.
- Click the Show all emails if you haven’t got a default email address to choose. The list will show you all the email addresses against those in the lists. Here you can tick the address that you would like the email to go to.
- You will not be able to choose the default from here. You will need to set the default against the record.
- Click OK
Make sure that you are happy with the options on the top of the screen. These are set as default with the template, but you are able to make changes here if necessary.

Change log options, Follow ups, importance and sensitivity, Request a delivery and/or read receipt
Changing the Log options will change the way that this email is logged in the database, against the record. This will be a set default within the template, but it can be changed here.
You can choose a different action that the template will be logged against, the date and time both default to the ‘now time’, and are not editable.
Enable email tracking* for: Choose timeframe you wish for tracking to be active, this can be setup within the template or user can adjust manually
*Infinity SaaS clients only see tracking section for more details
Details to be logged: Choose one of the following options
Template name: The name of the template
Template contents: The entire contents of the template
User defined details: Choose what is logged. When you choose this option a while box becomes available for you to type in the details that you would like to log.
- Click Close
Click on follow ups if you would like to create automatic call backs and / or tasks whenever you use this template.
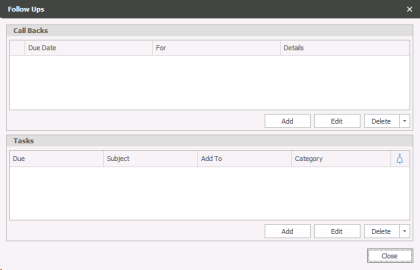
Create / edit / delete a Call back
- Click Add in the top half of the screen
- To edit, highlight the call back and click Edit
- Choose the type of call back you would like Infinity to create.
- Set when the Call back should be set for e.g. 1 Day, 2 Weeks etc.
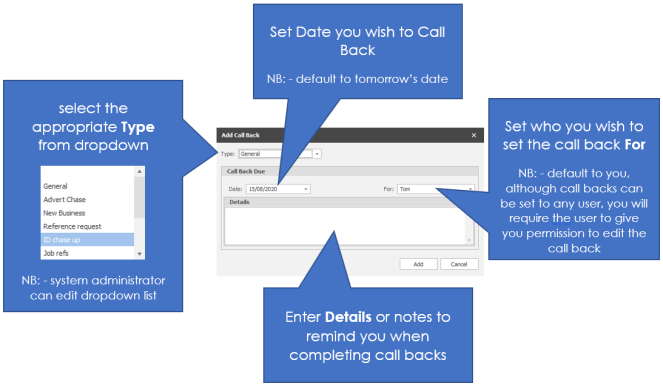
- Leave the For: {Logged on user} if you would like the call back to be set against the user that has sent the template.
- Enter further details into the details box if necessary
- Click Add orCancel
Create / edit / delete a Task
- Click Add in the bottom half of the screen
- Click Add in the bottom half of the screen
- To edit, highlight the task and click Edit
- Enter the Subject of the automatic task
- Set the time frame that you’d like to set the task for (e.g. 1 day, 2 weeks etc.)
- Set a reminder (if necessary)
- Choose the type of task, private normal or public
- Choose the individuals that you would like the task to be set against. Leave the {Logged in user} to add the task to the person that has sent the template
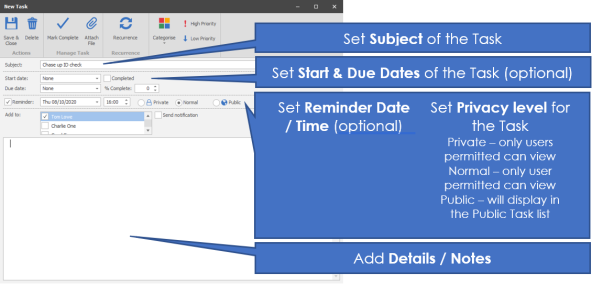
- Add any notes in the notes box
You can attach a file and set re-occurrences if necessary in the top tool bar.
- Click Save & Close when you are happy with the settings.
![]()
Message options
The formatting option are HTML (Recommended), plain text or RTF (Rich Text)
Set the importance of the email when it is sent
Set the sensitivity of the email when it is sent
Tracking & Delivery options
Enter a tick against any of the options that you would like to use with this email.
To edit a template you have already created
- Find the correct template by making sure that you have chosen the correct Comms centre and template type
- Highlight the template that you’d like to make the changes to
- Click Edit
![]()
- This will open the template as described in How to create a new template
If you need to move a template within the same comms centre you can by
- Highlight the template that you would like to move
- Click Move
- Choose where you would like to move the template to
- Click OK
The template will now show under the different folder.
NOTE – You are not able to move templates into other comms centres
If you would like to delete a template
- Highlight the template that you would like to delete
- Click Delete
If you need to rename a template
- Highlight the template that you need to rename
- Over type the name
- Click Save


If you require further assistance please contact Ikiru People using the details published on www.ikirupeople.com
Visit our Customer Portal at https://portal.ikirupeople.com/ for future events and clinics.
If you would like to make suggestions or have found any errors with this Help section please contact our Support team.
Version 4.87
Voyager Software is a brand of Ikiru People Ltd, a subsidiary of Dillistone Group Plc. The group is a leading global provider of software and services that enable recruitment agencies and in-house recruiters to better manage their selection process and address the training needs of individuals. Across its brands – which include Voyager Software (recruitment software UK & Australia), Dillistone FileFinder executive search software, GatedTalent, the global database of the world’s leading executives, Talentis.Global – the next generation of recruitment software and also ISV.Online, provider of online pre-employment skills testing and training tools. Dillistone Group serves thousands of clients worldwide. Ikiru People Ltd: Registration Number 02043300. Registered in England & Wales.
 |  |  |  |