User Administration

General
Infinity users are created and managed via User Administration (including Exchange Sync settings and integration credentials)
The User Administration screen is divided into three areas; Users – a list of existing Users, Teams – a list of existing Teams and associated members and Password Options – various password configuration settings.
Users
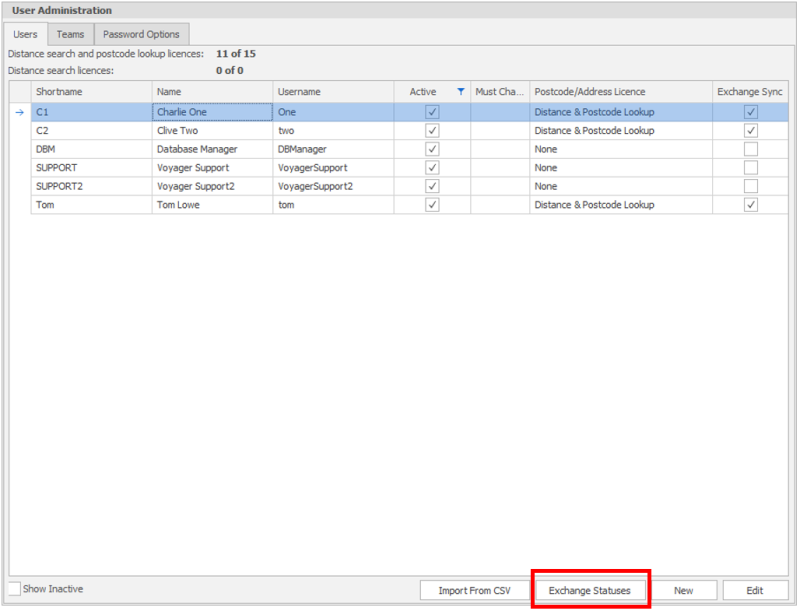
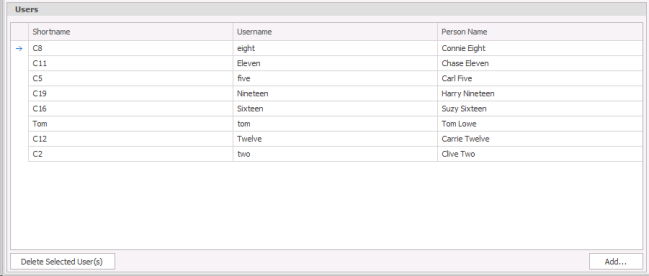
All ‘Active’ users are listed here with their key details, if you have Distance Search and / or Distance Search & Address Lookup licences it will also show which users have been assigned a licence. It will also indicate whether Exchange Sync is active.
You can also view inactivated users via the ‘Show Inactive tick box to the bottom left of the screen.
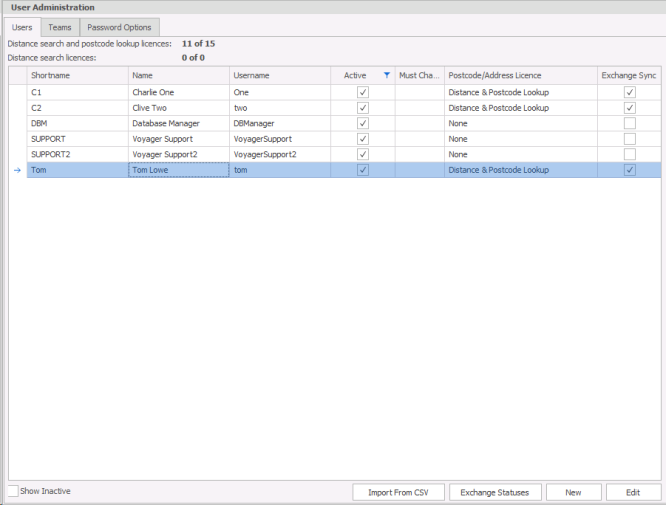
You can access the users information by selecting the user and clicking on Edit or by double clicking on the user. This will open the Edit User screen in which you will see all the details relating to that user. Many of these fields are used for merge codes for templates and you will need to consider how you enter the data to ensure they appear as desired, for example telephone number with spacing and job title that could be used in Comms Centre templates…
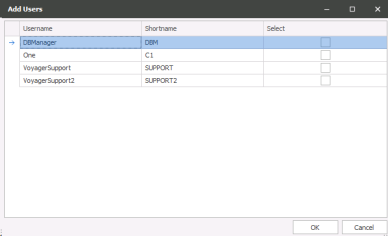
- Select

Enter the details of the new User:

- User name: used to log into Infinity.
- Forename: User’s forename.
- Surname: User’s surname.
- Short name: usually three character code used throughout Infinity.
- Password: the User’s password, used to log in to Infinity or leave blank (set by the user when logging on)
- Confirm Password: confirm the User’s password.
- User cannot change password: tick if you do not want the user to be able to change their own password.
- Password never expires: tick if the password should never expire.
- Account is active
Complete the New User screen and select Continue to proceed to complete the User details.
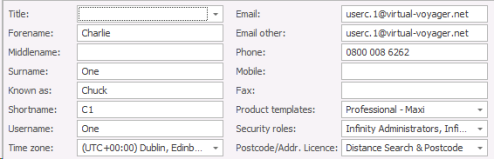
- Title: select title from the selection list.
- Forename: User’s forename
- Middle name: User’s middle name
- Surname: User’s surname
- Known as: the name the user may be known as
- Short name: usually three character code used throughout Infinity.
- Username: the name for logging into Infinity
- Time Zone: automatically assigned from the local computer
- Email: User email address
- Email Other: Alternative email address (SMTP email address usually the same as user email address)
- Phone: Phone number
- Mobile: Mobile number
- Fax: Fax number
- Product Templates: One or more Product Templates that are available for this User
- Security Roles: One or more Roles that the User is assigned to.
- Postcode / Addr. Licence level: This will be available if you have purchased Distance Search licences, you can assign the Distance Searching & Lookup function or Distance Searching only or None
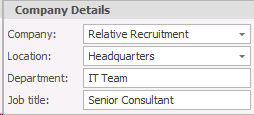
- Company: Select Company
- Location: Select Location
- Department: Enter User’s Department
- Job Title: Enter User’s Job Title
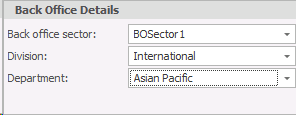
- Back Office Sector: Select from the list
- Division: Select from the list of Divisions
- Department: Select from the list of Departments for Placements
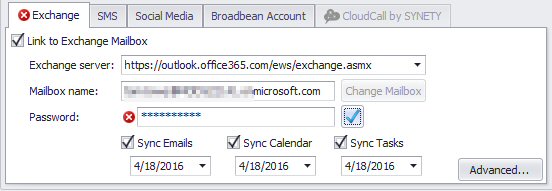
Setup Exchange synchronisation for the user, this will enable the synchronisation of emails, calendars and / or tasks, please see the user exchange sync section for more details
NB: - if you do NOT wish to have any synchronisation then un-tick the Link to Exchange Mailbox, you can tick this later if required
See Exchange Sync section below for more details
Once you select the appropriate Exchange Server you will then be able to access the Authenticate button:
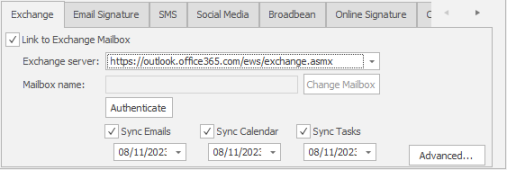
You will then receive a dialogue box to then log into the exchange account using the mailbox and password details for that account.
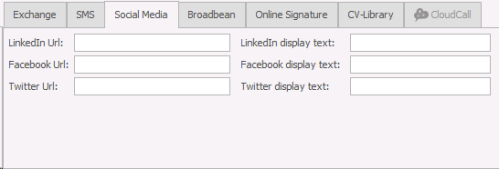
- LinkedIn Url: for Users LinkedIn account
- LinkedIn display text – set preferred text rather than display the URL
- Facebook Url: for Users Facebook account
- Facebook display text – set preferred text rather than display the URL
- Twitter Url for users twitter account
- Twitter display text – set preferred text rather than display the URL
Each of these fields can be used in the Comms Centre to merge information.
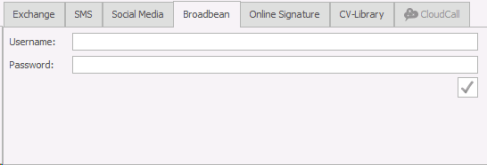
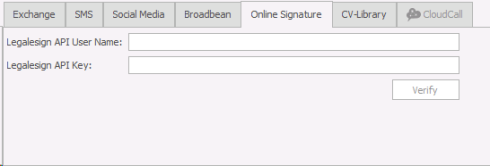
Enter Broadbean Adcourier username and password
Click on the tick to verify these credentials 
NB:- Broadbean will need to be activated via the Job Posting section
Enter LogicMelon username and password
Click on tick to verify these credentials
NB:- LogicMelon will need to be activated via the Job Posting section
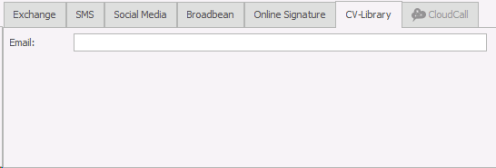
Enter email address as registered with CV Library for each user
Once activated the CV Library tab will be included in all candidate searches (ad hoc or job searching):
![]()
Enter Account Number and Password
NB:- Synety will need to be activated via the Phone Manager Options
Security Options
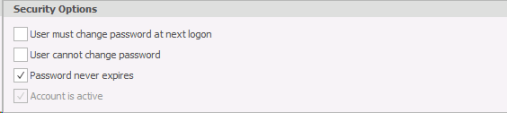
- User must change password at next login – will prompt user to for a new password when logging in
- Tick box – User cannot change password
- Tick box – Password never expires
After all the information has been entered for the new User you can either select  or continue and set the User’s Password.
- Select
 and complete the new password for the User.
![]()
Set User Permission
Finally configure the Permissions for the User, select  to launch Permissions. Find out how to configure access levels and specific permissions here, you can also assign users into roles from within the Permissions area.
Edit a current user
If you need to make any changes to a User’s details select the User and select  and the User Details will be displayed. Make the necessary changes and click to save.
Setting up users exchange synchronisation can be setup for:
- Emails
- Calendar
- Tasks
This allows any entries into exchange will be copied into Infinity and anything added into Infinity will copy into the exchange (which will feed into Outlook). You can use exclusions from the Exchange Admin area to avoid internal emails and any other email addresses are excluded from the synchronisation, see the Exchange Admin area for more details
Once you select the appropriate Exchange Server you will then be able to access the Authenticate button:
You will then receive a dialogue box to then log into the exchange account using the mailbox and password details for that account.
Validation Failure
A red X  will notify you that it has failed to validate the exchange details input, please try again. If it continues to fail then please check credentials, Office 365 accounts can be checked by going to https://outlook.office365.com/ using the same credentials. If it does log in then contact Voyager Support. If it does not login then contact your Office 365 Administrator.
Validated
Will display a green tick 
Tick Sync Emails (default) to ensure full synchronisation is setup, if you do not wish to fully synchronise emails use the Advanced Options
Tick Sync Calendar (default) to ensure synchronisation of calendar
Tick Sync Tasks (default) to ensure synchronisation of tasks
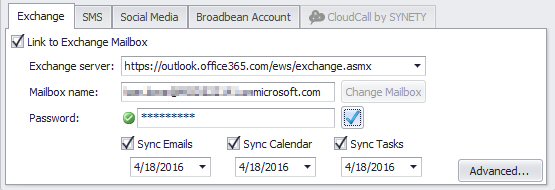
NB: - You are able to set the date as desired but this will delay the synchronisation of new emails
If you do NOT wish for all emails to be synchronised then use the advanced options to select appropriate folders within Outlook (Exchange mailbox) to be synchronised, un-ticking inbox or sent items as required.
Tick to Show all mailbox folders, you can then select which folders you wish to synchronise to Infinity
NB: - if you wish all emails to be synchronised then leave Inbox and Sent items ticked (default)
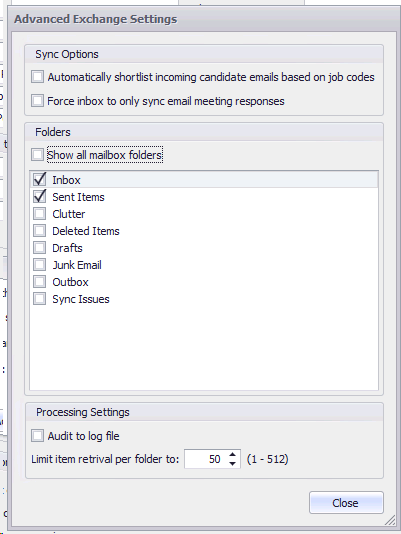
Automatically shortlist option, enables Infinity to identify any emails, from candidates already within Infinity, which include the Job code to be automatically shortlisted for that job.
Force inbox to only sync email meeting responses, enables Infinity to ignore all emails except those that are meeting responses, you will need to leave Inbox ticked.
• The 3 ‘Sync’ tick boxes can be used to turn on / off sync
• When you un-tick the 3 ‘Sync’ tick boxes, Exchange sync will remember when Exchange Sync was stopped
• When you tick the 3 ‘Sync’ tick boxes, Exchange sync will continue from where it stopped
• You can change the mailbox via the ‘Change Mailbox’ button
• You are warned that all synchronisation on the previous mailbox will be stopped, and synchronisation on the new mailbox will start.

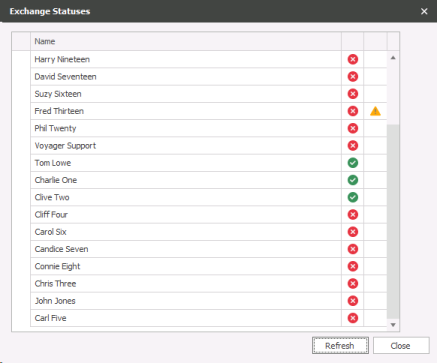
Allow you to view the current status of all exchange accounts which you have setup to synchronise. The statuses are checked every 60 minutes and the users are alerted via their notification bar.
There are three columns:
First column includes the name of the user
Second(as below displays ticks and a cross) is displaying whether there has been synchronisation activity in the last 60 minutes. A tick in this column means that Exchange Sync is working. If no new Emails / Calendar / Tasks items were sent / received, this column will still display a tick if Exchange Sync is working.
A cross in this column means that Exchange Sync is not working. This could be for various reasons including no internet access and the Exchange server being down. If Exchange Sync fails, Infinity will continue to try to communicate with the Exchange server.
The third column (with the warning symbol against Richard Smith) is for exchange alerts, generally for authorisation errors (change of password to the users exchange account).
An Authorisation Error indicates that the exchange server reported that the mailbox name / password were not correct. This column will automatically clear once the Authorisation Error has been cleared.
The users will be asked for their new passwords when logging into Infinity, they can also use the Change Exchange Password from the application menu or use then notifications bar, see the notifications bar section or application menu section for more details
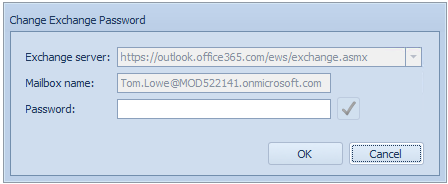
Once the new password has been corrected it may take up to 60 minutes to be reflected within Infinity but the warning will be removed

 IMPORTANT – This is not reversible ensure you complete the actions carefully as the transferring of
You can deactivate a user via the  button, clicking on this button will bring up the Transfer User area:
![]()
Each record that includes a field for Consultant is available here so that you can transfer any records that have the previous users name against, transferred to an alternative user. If any of these dropdown choices are left blank then it will assume that no action is necessary and the previous users name will still show within these records.
NB:- If you prefer not to transfer any details to other users then you can click on Cancel but still click on OK in the Edit User screen to keep the deactivating / inactivating user selection.
Infinity has the option to group Users together into teams. This is particularly useful for reporting and group targets shown in the Dashboard.
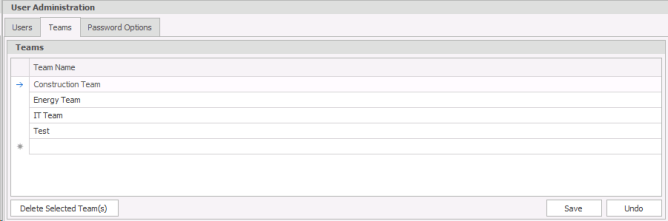
Click into the next empty row in the grid and enter the name of the new Team.
- Select the Team that you wish to delete
- Tick into the delete tick box
- Click

- Highlight the Team that you wish to assign Users to and then select
 and select from the list of Users to assign to that team. Click
- Click
NB:- it is highly recommended to only assign users to one team, if assigned to multiple teams it will only allow the user to view the first team dashboard, the other would need to be accessed by giving them access to all team dashboards. In addition, it will assume the users statistics to be allocated to both teams in full, therefore inflating the statistics.
- Highlight the team that you would like to amend
- At the bottom of screen, find the user that you would like to remove
- Enter a tick into the delete tick box on the right of their name
- Click
NB:- A user can be added to more than one team, when using the reports (with team parameters) this will include the user in each of these teams but when they view their dashboard it will only show the first Team that user was added to
 IMPORTANT – Please note for SaaS systems you cannot edit the password options, it is imperative that users set strong passwords and therefore all password options are active and cannot be disabled, see http://www.nidirect.gov.uk/be-secure-online for information relating to strong passwords
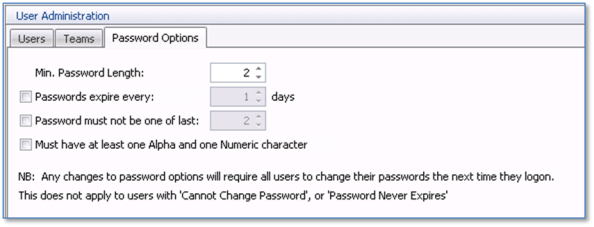
Configure User Password Options
Each User has a password with associated password options which can be set as follows:
Min Password Length: set the minimum number of characters allowed for a user password
Password expires every: set the number of days when a password will expire
Password must not be one of the last: do not allow the user to re-use previous passwords within a certain number
Must have at least one Alpha and on Numeric character: to make the password more secure it must contain at least one numeric and one alpha character.
Multi-factor authentication is available for Infinity database logins only. Users will not have to authenticate when entering their password on an Infinity timeout window, logging into the Infinity Connect app or the Infinity Outlook Addin
Microsoft Authenticator and Google Authenticator phone apps are supported. It’s the customer’s responsibility to ensure that the user’s smart phone devices have this installed and functioning.
Setup
There is a global setting in Administration / General tab to enable multi-factor authentication (MFA) for all users (this includes dbmanagers)
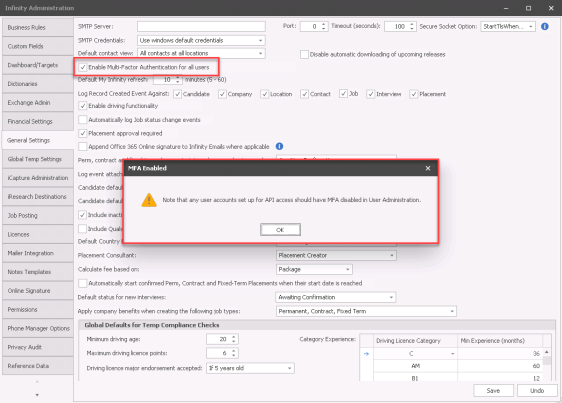
The setting is off as default.
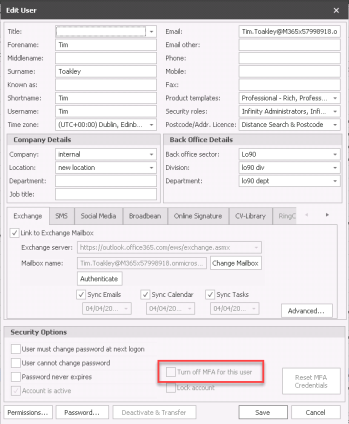
When ticked a warning is given that user accounts used for API access should have their MFA disabled. There is a setting in User Administration / Edit User screen to disable/override the global setting for that user
Logging in
When an MFA user logs into Infinity for the first time and enters their password, they will be prompted to scan a QR code to setup their device. The user must scan the QR code on their authenticator app and set up their device
Once done the user can click OK in the Infinity window, to continue logging in and enter a 6 digit code when prompted. The 6 digit code generated by their authenticator app must be used and will regenerate every 30 seconds. Users will need to use their authenticator app each time they login to Infinity
Troubleshooting
If the user enters the wrong 6 digit code 3 times consecutively, their user account will lock and this can only be unlocked in User Administration
If the 6 digit code is correct but not accepted check the Infinity client machine and smartphone device is set to current time. The time needs to be set correctly to avoid timing issues with the 30 second regeneration of codes
A user account is unlocked by unticking the ‘Lock account’ field
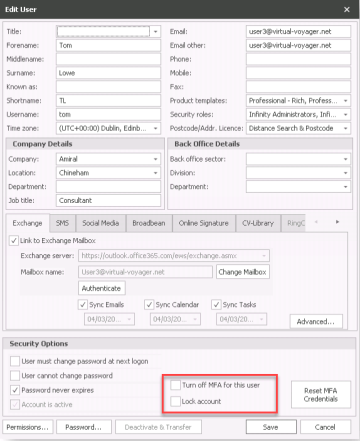
When a user account is unlocked it will ask whether to also reset the user’s MFA credentials
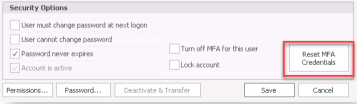
If the account is un-locked only the user must enter the 6 digit code when they next log in
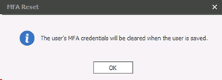
If the credentials are reset the user will need to scan the QR Code and set up their device again when they next log in. Credentials can also be reset by clicking on the ‘Reset MFA Credentials’ button. Resetting credentials should also be used if the user loses their device for example. Once reset the users is given the following notification
If all Infinity administrator accounts are unable to authenticate and log in to Infinity then please contact our technical support team who will be able to disable MFA on the database for you. This is the Drop-down text)


If you require further assistance please contact Ikiru People using the details published on www.ikirupeople.com
Visit our Customer Portal at https://portal.ikirupeople.com/ for future events and clinics.
If you would like to make suggestions or have found any errors with this Help section please contact our Support team.
Version 4.87
Voyager Software is a brand of Ikiru People Ltd, a subsidiary of Dillistone Group Plc. The group is a leading global provider of software and services that enable recruitment agencies and in-house recruiters to better manage their selection process and address the training needs of individuals. Across its brands – which include Voyager Software (recruitment software UK & Australia), Dillistone FileFinder executive search software, GatedTalent, the global database of the world’s leading executives, Talentis.Global – the next generation of recruitment software and also ISV.Online, provider of online pre-employment skills testing and training tools. Dillistone Group serves thousands of clients worldwide. Ikiru People Ltd: Registration Number 02043300. Registered in England & Wales.
 |  |  |  |