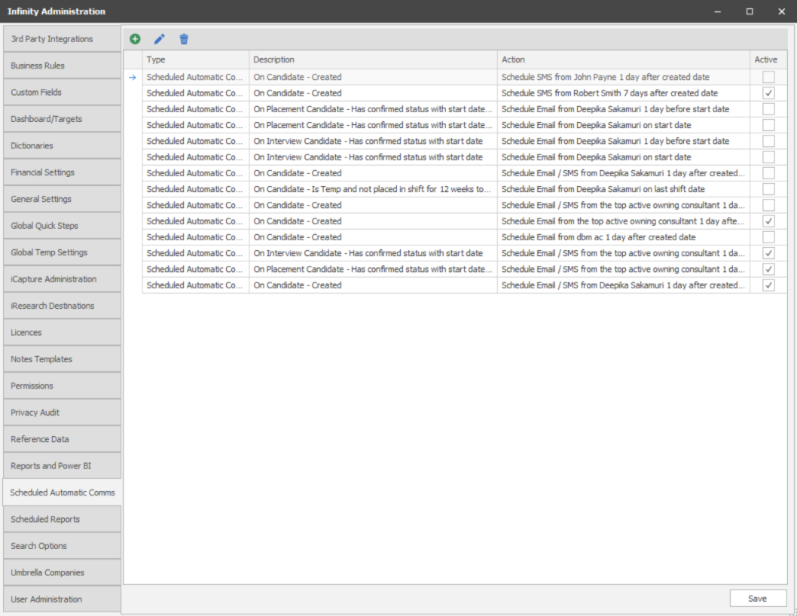
Scheduled Automatic Comms
![]()
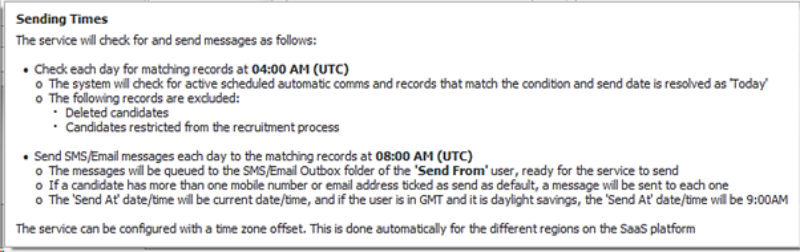
Setup system-wide automated SMS and Emails, you will need to ensure you have created the SMS or email template prior to setting up this automation, see Comms Centre template section for more details. Once template(s) are in place you can then setup an automation, this allows you to select a condition (trigger) and then set the type(s) of communication (SMS or email), set which user the email should be sent from and then when this automation should occur. Once setup these automations will then be added to Queues (SMS and Queued scheduled emails) prior to being sent. In the queues section you can review and cancel a send out if required. The service that completes the automations will check matching records at 4am UTC (excluding deleted candidates, restricted candidates and missing email addresses) and then will run at 8am UTC. In addition, My Infinity includes details of any overdue email (scheduled emails section) and overdue SMS (SMS section).
It is highly recommended that you make user(s) aware that there are automated comms setup so they can monitor failed send outs. We would also recommend that you test any templates prior to setting up an automation.
Note:- you can setup automated call backs / tasks / emailing via event actions using Quick Steps
Scheduled automated comms will send via exchange, SMTP with Windows default credentials is not supported with this functionality, all other SMTP credential setup types are supported.
Overview Video
NOTE:- Additional TrustID condition has been added, see below
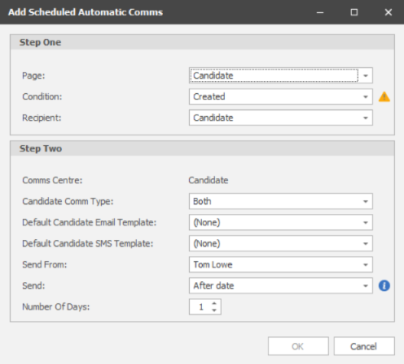
Step One
Set your page (record) you require an automated SMS or email, the condition (trigger) when the automation should occur and recipient.
|
Page |
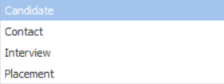
Select which record / page type you wish to set your automation against
|
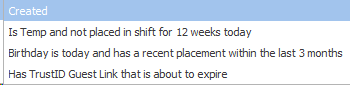
| Candidate Conditions |
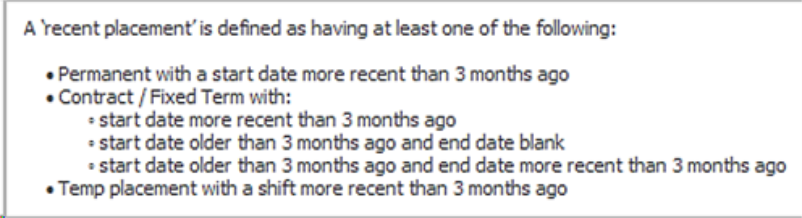
Created - will apply to all candidates created (manually or via iCapture) Is Temp and not placed in shift for 12 weeks today - will set the automation against all candidates marked as Temp and has no shift assigned to them for 12 weeks (from today’s date) Birthday is today and has a recent placement within the last 3 months - will set the automation against all candidates that have date of birth filled out (day and month) and has been placed in the last 3 months (or assigned shift(s) for Temps) Has TrustID Guest Link that is about to expire - set how many days prior the expiration date you would like the automated Comms to send to candidates who have registered via TrustID* *requires TrustID integration
|
|
| Contact Conditions |

Contact at Companies (not type internal) with contact last activity 3 months ago today - will set the automation
|
|
| Interview Conditions |

Has confirmed status with start date -
|
|
| Placement Conditions |

Has confirmed status with start date (Perm / Fixed Term / Contract only)
|
|
| Recipient |
set who should be receiving the SMS / Email
Interview and placement can set whether the automated email should go to the candidate or contact related NB:- if you wish to set automation to both candidate and contact, setup 2 separate automations
|
Information button - hover over to reveal information on Send:
Candidate condition
When the ‘page is selected as ‘Candidate’ and the ‘condition’ is selected as ‘Created’, emails are not sent if more than 200 candidates are matched.
Users will be notified in the Connectivity Centre:
‘The Scheduled Automatic Email comms was not sent on {date} for candidates created on {date} as more than 200 candidates were matched. The comms will need to be sent manually to the candidates.’
Placement condition
Step Two
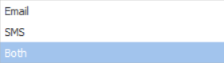
Set which Comms type you wish to send out (SMS / Email / Both) and the template you wish to send out and when this should occur.
Comms Types
|
Sending email via an exchange account | |
| SMS | Sending SMS* via your messaging account* | |
| Both | Sending both SMS* and email, send out both SMS and email simultaneously |
* SMS requires an SMS account, please contact customer services for more information and current pricing
Email Template - select which email template you wish to send out
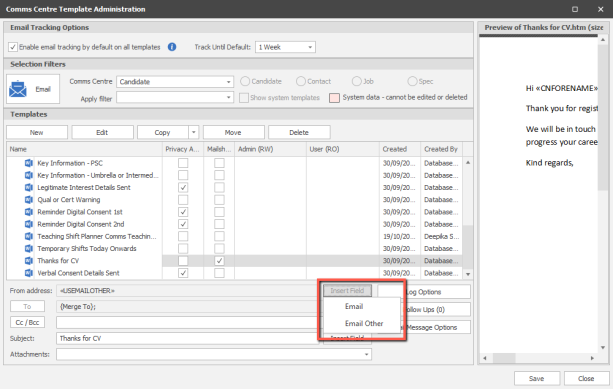
NOTE:- if you wish to use SMTP to send out emails then ensure the template is set to Email Other in the template administration:
SMS Template - select which SMS template you wish to send out
Send From - select the user account you wish to send the email from
NOTE:- user must be active to pass validation rules, see validation section for more details
Send - select when the automation should occur, Today or after date. If after date you will then be able to set the number of days after the date it should be sent
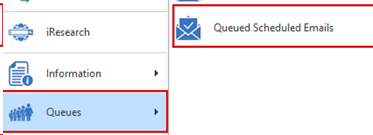
you can review automations via the Queues section of the application menu:
The Queue displays emails scheduled:
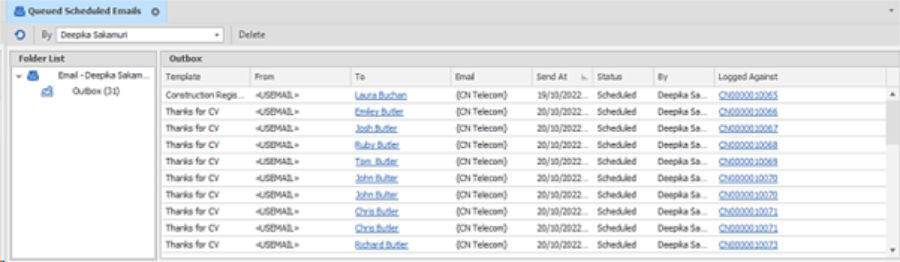
This defaults to show the currently logged on user’s Infinity outbox folder and messages within
The grid has columns for the following:
- Template – name of the Comms Centre template to be sent
- From – shown as either <<USEMAIL>> or <<USEMAILOTHER>> which will be as set in the Comms Centre template, and sends the email using the user’s ‘Email’ (MS Exchange) or ‘Email other’ (SMTP) address in the User Admin screen
- To – forename and surname of entity being sent to (e.g. candidate) and hyperlink to that page
- Email –shown as {CN Telecom} and is linked to the specific email telecom id the messages was queued to
- Send At – queued date / time
- Status – can be ‘Scheduled’ or ‘Invalid’ or 'Failed'
- ‘Scheduled’ when first queued and waiting to be sent by the service
- ‘Invalid’ if validation checks fail
- 'Failed' if cannot be passed to the user’s Microsoft Exchange mailbox
- Logged against – the page reference the email was sent from and shown as a hyperlink to that page
The toolbar has the following options:
- Refresh - refresh the list of messages
- ‘By’ field filter - to show all users’ outboxes or can select an individual user
- Resend Failed – resends the selected failed message(s)
- Delete – deletes the selected message(s)
- Users with Database Manager access and support accounts can delete any message
Non-Database Manager users can only delete their own messages
Emails / SMS that haven't sent can be reviewed in the Queues section and within users My Infinity.
This shows the number of messages in the Outbox folder of the My Infinity user that haven’t sent as follows:
- At status ‘Invalid’ that were queued more than 1 hour ago
- At status ‘Failed’
The hyperlink opens the Overdue Outgoing Email window listing those messages. The user can correct the invalid data, correct failure issues, resend failed messages or delete them
Notifications will disappear from the My Infinity section if the message is deleted or is successfully passed to the users’ Microsoft Exchange mailbox
The email template is validated before merging and passing the message to Microsoft Exchange. If the message fails validation, the status shows as ‘Invalid’ and the message remains in the list. Details of the validation error can be seen by hovering over the status field
![]()
The current validation rules are as follows:
- Candidate must be active
- Candidate is not deleted
- To email address cannot be blank / deleted
- Send as Default must be ticked against the email address
- If the Email Comms Centre Template being sent is ticked as Mailshot, Ok to Mailshot must be ticked on the email address
- Comms Centre template has not been deleted
- Comms Centre template does not have post attachments
- Privacy Audit at status the candidate can be updated to, if Event Action set to Privacy Audit one
- User has permissions to create follows up against the specified user
- From User is active
If the validation issue is corrected by the user, the service will send it automatically on its next poll without further interaction. The message can also be deleted if required without sending
Failed to pass to Microsoft Exchange
If the message is unable to be passed to the user’s Microsoft Exchange mailbox for sending, the status shows as ‘Failed’ and the message remains in the list. Details of the failure can be seen by hovering over the status field

If the failure issue is corrected by the user, then it must be manually resent by clicking the ‘Resend Failed’ button on the toolbar. Only messages at a status of ‘Failed’ can be manually resent. The failed message can also be deleted if required without sending


If you require further assistance please contact Ikiru People using the details published on www.ikirupeople.com
Visit our Customer Portal at https://portal.ikirupeople.com/ for future events and clinics.
If you would like to make suggestions or have found any errors with this Help section please contact our Support team.
Version 4.87
Voyager Software is a brand of Ikiru People Ltd, a subsidiary of Dillistone Group Plc. The group is a leading global provider of software and services that enable recruitment agencies and in-house recruiters to better manage their selection process and address the training needs of individuals. Across its brands – which include Voyager Software (recruitment software UK & Australia), Dillistone FileFinder executive search software, GatedTalent, the global database of the world’s leading executives, Talentis.Global – the next generation of recruitment software and also ISV.Online, provider of online pre-employment skills testing and training tools. Dillistone Group serves thousands of clients worldwide. Ikiru People Ltd: Registration Number 02043300. Registered in England & Wales.
 |  |  |  |