Placements
A placement record is created when:
- logging an offer event within an interview record
You can then utilise the event logger to go through the shortlist process in full, see the shortlist process section for more details.
- selecting placement from within the shortlist - fast track placement
- Selecting Place Candidate from a Temp job record
- Placing candidates from the Unfilled Jobs Board (Temp jobs only)
You can then utilise the event logger to confirm and then start the placement.
IR35 Status and Verification is recorded within the job record but also utilises the candidate worker type, please see the IR35 section for more details.
Much of the information that will see in the placement screen will have been defaulted from other areas of Infinity. You may be able to change some of the information.

The image below shows the status in a red box:
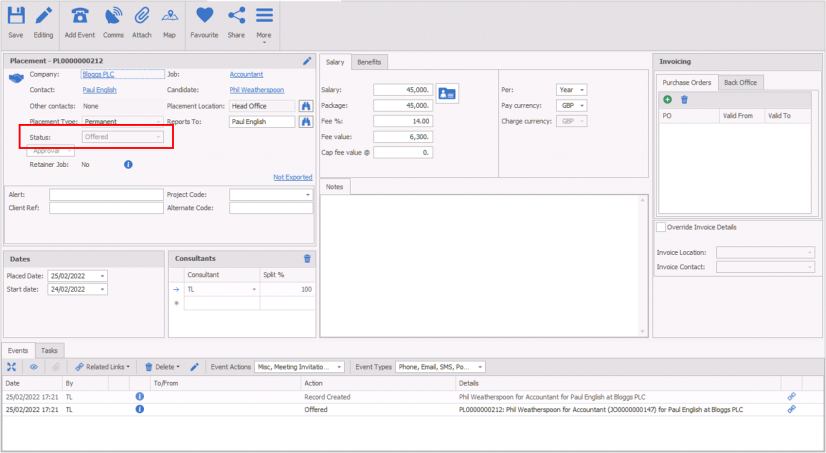
Basic Details
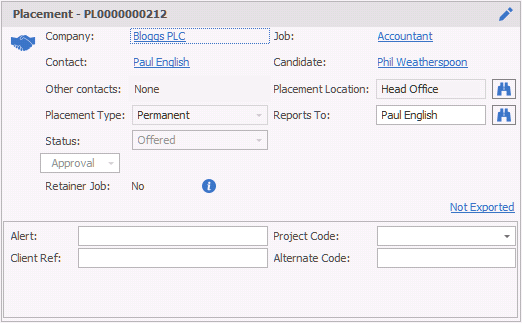
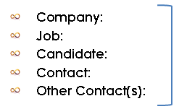
This is information will be pulled from the Job. Each of the fields that are in blue are links and can be clicked to go to the relevant part of Infinity. Each of these would open a new tab
 Edit:If you need to make a change to the contact, click on edit. It is also here that you will able to add other contacts to the placement.
Placement type:This is the type of placement that you are creating. Perm / contract / temp. You are not able to change this once the placement has been created.
Placed Date: Choose the date that the placement was made
Status: This is the status of the placement. You cannot change the status of the placement here, but you must complete the relevant actions to change the status. You are able to do this through the event logger, or shortlist.
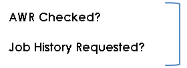
These tick boxes may be ticked manually or automatically when you log an event advising infinity that you have checked the AWR and / or requested the candidates work history
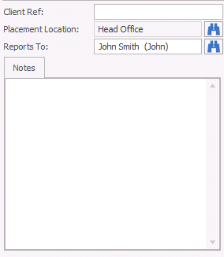
Client Ref: Enter a client reference if necessary
Placement Location: This is the location of the placement. Click the binoculars if you need to change this. This is defaulting from the job
Reports to: This is report to name for the placement. It will have defaulted from the Job. To change this, click the binoculars
Placement Notes: Allows you to input any notes as required. As a text box you are able to double click within the box and launch the Infinity editor, please see the Infinity Text Editor section for more details.
The Dates box will display differently for each placement type and will initially copied from the job record:
Perm

Start date of the job, if the ASAP is ticked then it will disable the start date entry
Contract

Start date of the contract, if the ASAP is ticked then it will disable the start date entry
End date of the contract, if you have entered a duration then this will automatically complete the end date
Duration can be used to automatically complete the end date, if preferred you can manually enter the end date and leave the duration blank
Hours should include the hours of work, hours per day, hours per week etc. This will allow dashboards and reports to calculate revenues
Fixed Term
Start date of the fixed term contract, if the ASAP is ticked then it will disable the start date entry
End date of the fixed term contract, if you have entered a duration then this will automatically complete the end date
Duration can be used to automatically complete the end date, if preferred you can manually enter the end date and leave the duration blank
Hours should include the hours of work, hours per day, hours per week etc. This will allow dashboards and reports to calculate revenues
Temp
The work pattern is accessible within the Placement Calendar, see below.
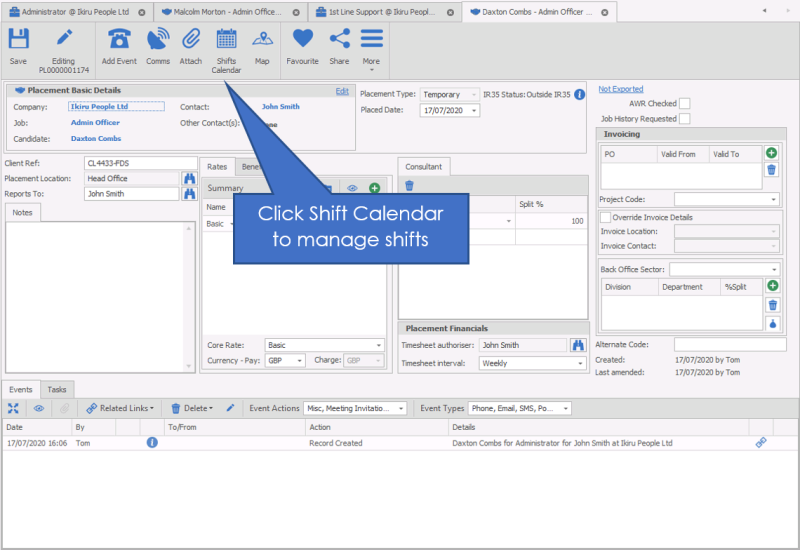
Within the Placement record you are able to remove shifts via the placement calendar  and also assign additional shifts that are setup within the job calendar. Placement Calendar button When opening the calendar it will go to the end date by default.
The rates on the Temp Placement page default to those entered into the Rate grid on the Temp Job page

| Back |

|
Go backward to view previous |
| Forward |

|
Go forward to view next |
| Goto Today |

|
Return to today’s date |
| Zoom In |

|
Allows you to zoom into the calendar NB:- you can also use SHIFT and MOUSE WHEEL UP |
| Zoom Out |

|
Allows you to zoom out of the calendar |
| Day View |

|
Allows you to view the calendar as a single day view, showing hour by hour (zoom in or out for more detailed view) |
| Work Week |

|
View Allows you to view the calendar as a detailed working days in a week, showing hour by hour (zoom in or out for more detailed view) |
| Week View |

|
Allows you to view the calendar by week in a compact view (no zoom function) |
| Month View |

|
Allows you to view the calendar in a month view, showing start and end times of appointments (zoom in or out for more detailed view) |
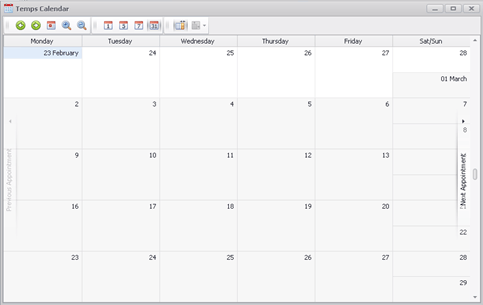
| Compress Weekend |

|
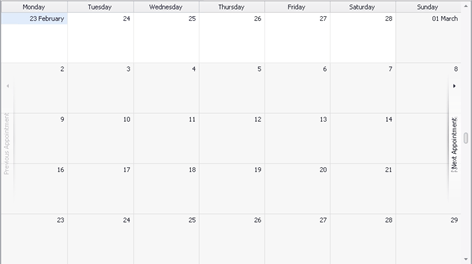
(only available in month view) – Allows you to compress Saturday and Sunday together for more compact view of the monthly calendar uncompressed:
Compressed:
|

|
Mark all shifts as "Confirmed", allowing you to quickly mark all unconfirmed shifts as confirmed | |
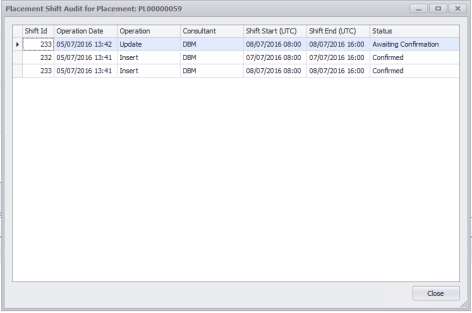
| Placement Shift Audit |

|
Allows you to access the shift audit logs, an overview of changes made to the shifts, including date of change, type of change, consultant, shift start and end times and the status of the shift
|
To add entries to the placement Calendar, click Add Shifts button to access the Job Calendar
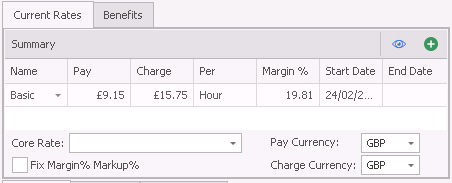
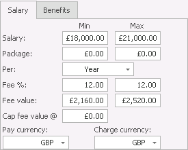
The current rates will initially come from the Job but can be adjusted within the Placement.
- Pay Currency: This the Currency that the candidate will be paid in. This doesn’t have to be the same as the change currency. This can be changed here, or in the detailed view
- Charge Currency: This is the currency that the company will be billed in. This doesn’t need to be the same as the pay currency. You cannot change the charge currency as it becomes set from the job record when creating the placement record
- Fix Margin % Markup %: If this is ticked changes made to the pay / charge rate will keep the original margin or markup % entered and adjust the pay / charge rate as necessary. If the tick is not entered the margin / markup % will be adjusted when the pay / charge rate is changed.
- Worker Type: PAYE In the example above the candidate is a PAYE candidate. To change this, you would need to change the worker type on the candidate screen.
- Core Rate: define which rate should be used to calculate revenue within reports and dashboards etc...
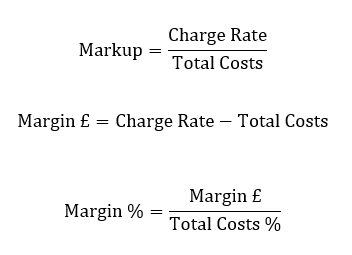
Making a change to the rates
 If you need to make a change to the rates, click the Rate change option within the grid
Enter the date of the rate change date and the pay and charge rates, with the margin. If you have TOB’s set against the company, if these are different from the agreed amount, Infinity will advise you of any differences when you save the record.
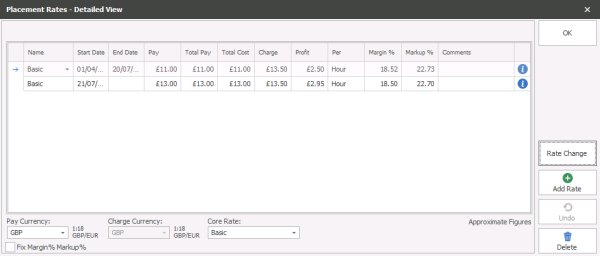
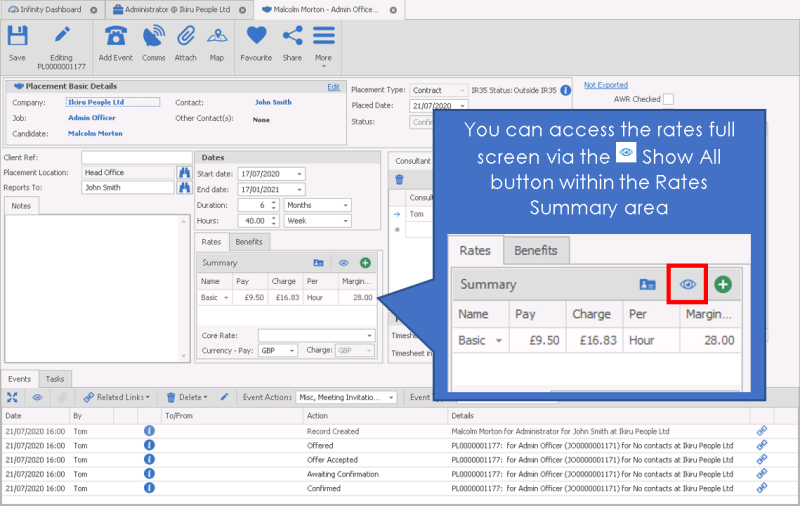
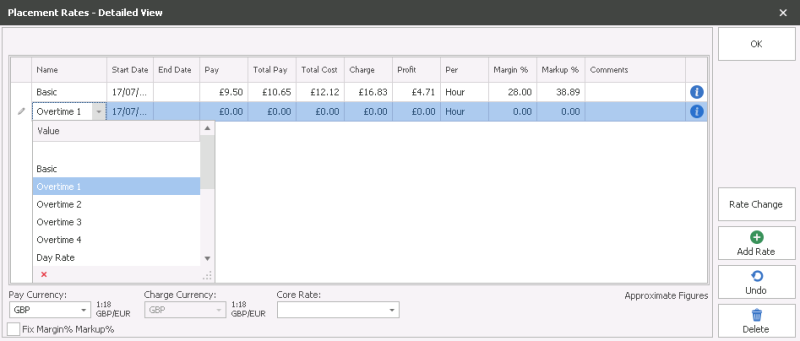
View the rates in more detail
To view more details of the rates, click detailed view
You can over type the pay and charge rate here. Is it advised that you only do this when you first create the placement, and not as a rate change. Use the Rate change button to make changes to the rates.
Click OK to return to the main placement screen.
Adjusting the End Date
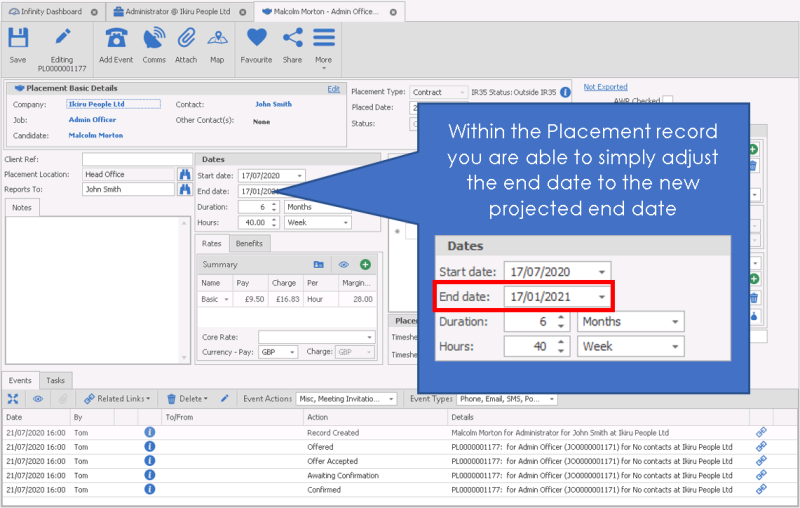
Clicking Save and this will set the end date, update the candidate record, restart the placement (if it had been finished) and log an event with the description including the extension dates (this will show in the placement record, candidate record, contact record and the job record):

Adjusting the Rates
Add Rates
Within the Rate Grid you can then Add Rates, this will add a new line below the current entry
You can adjust the Rate Type, Start Date of the rate, pay, charge / margin / markup (these will auto populate depending on which you enter into)
Delete Rate
Within the Rate Grid you can select a rate and then Delete via the Delete button
Rate Change
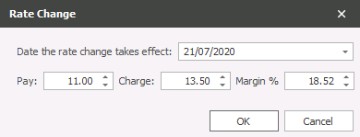
If an existing rate is due to be changed then you can use the Rate Change button:
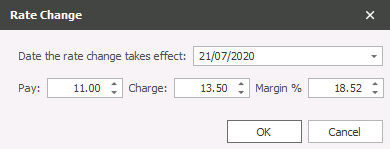
The effective date will assume today’s date but you can adjust as necessary, input the Pay, Charge / Margin % details:
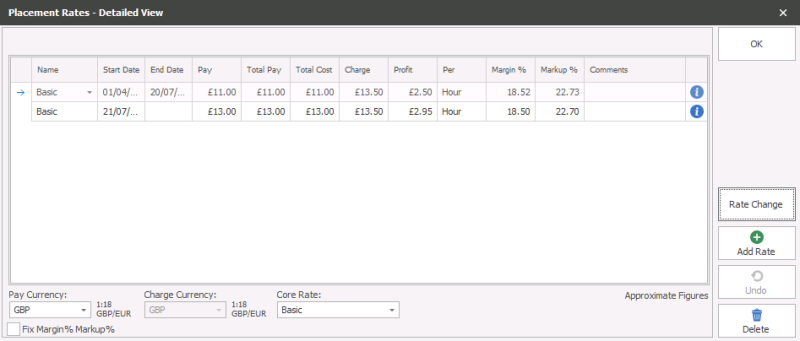
This will now show the existing / old rate with an end date (day before the new rate) and the new rate to start from the effective date.
NB: - Adjusting rate details does not log an event
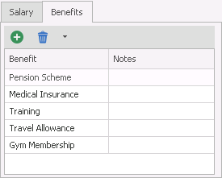 The benefits will default from the Job; you can add and remove as necessary here.
Use the Plus Icon to add a new Benefit and the Bin icon to remove benefits.
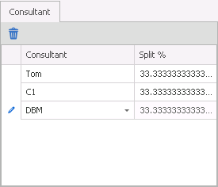
Infinity will automatically default the consultant that is logged in as the consultant. Anyone added to this area will then receive reminders via My Infinity's Review List and To Be Confirmed sections.
NB:- You can add a consultant add adjust to 0% split to ensure appropriate consultants receive reminders of the placement
To add extra consultants
- Click on the consultant field and choose the consultant from the drop down list
- As you add names, Infinity will automatically split the ownership equally.
You can change the split percentage manually.
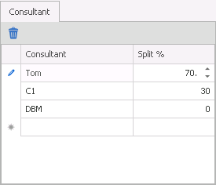
To remove a consultant from the list, highlight the name and click on  delete button.
 NOTE – If you delete a name from this list, Infinity will NOT automatically re-adjust the percentage amount
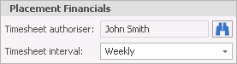
Timesheet authoriser: This will default to the main contact but can be adjusted as required via the binoculars
Timesheet Interval: This is the frequency that you would expect a timesheet to be submitted for this placement. (If necessary)
Alternate code: Enter a different placement code here if you need to
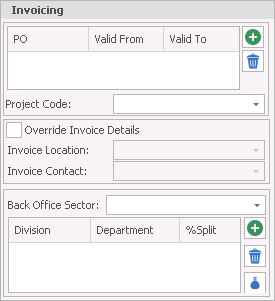
This is the area that information relating to PO numbers and project codes will be defaulted from the Job. You are also able to manually enter the information here
PO’s that have been allocated to Jobs will already show in the placement
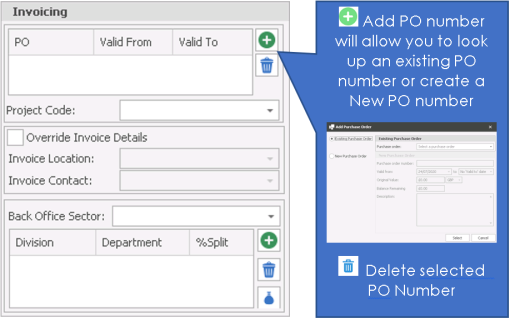
PO Numbers will be accessible within Company Financials and whilst active will be available in any other jobs or placements for the same company
The project code will have automatically been defaulted from the job if it was allocated. If not, you are able to add the Project code here.
Choose the Project code from the list. The project code will now be allocated to the placement.
For more details on Project codes and how to create them, see the section on Project Codes for more details.
Invoice address / contact details
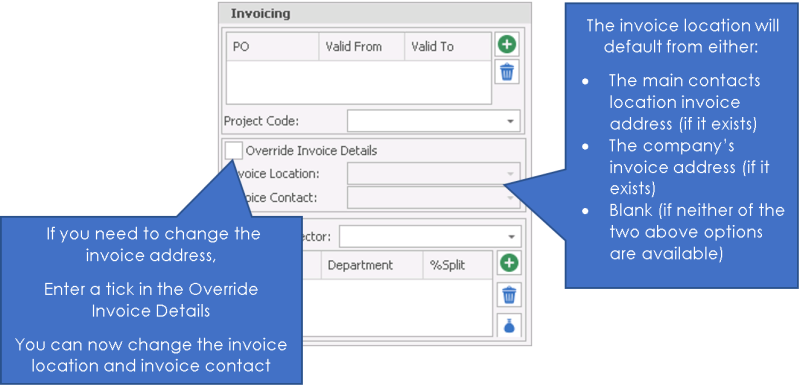
NOTE – You will only be able to choose from those locations and contacts that have already been assigned to the company.
This is controlled by your product template that will default the correct division & department.
You can change it here is you have the access right to do so.
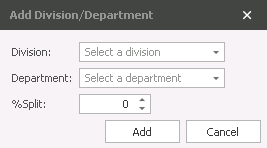
Adding to a division and department split
Click the Green plus to the right of the Division & department.
Choose from the available options
Click Add to save
Changing the division & department splits
To make a change, simply overtype the options that are already entered into the divisions & department area
NB: - System Administrator can add Divisions and Departments to Infinity via Back Office Admin

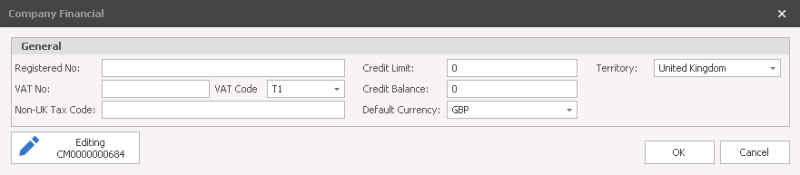
The information held in here is a direct link to the company record.

These are system generated fields that are updated by Infinity when a user creates and amends the placement screen
Events
These are the events that have been created against the placement.

 Expand the event grid to view more notes |
|

|
Show All events, opens a separate dialogue box |

|
Access relevant attachments for the highlighted event |

|
Access relevant records relating to the highlighted event |

|
Delete the highlighted event* *permissions required |
|
|
Edit the highlighted event* *permissions required |

|
Filter the events by Action, multi-selection available to filter the grid to desired content |

|
Filter the Event Types , multi-selection available to filter the grid to desired content |

Tasks
You are able to create a task against a placement. You will see them here.


If you require further assistance please contact Ikiru People using the details published on www.ikirupeople.com
Visit our Customer Portal at https://portal.ikirupeople.com/ for future events and clinics.
If you would like to make suggestions or have found any errors with this Help section please contact our Support team.
Version 4.87
Voyager Software is a brand of Ikiru People Ltd, a subsidiary of Dillistone Group Plc. The group is a leading global provider of software and services that enable recruitment agencies and in-house recruiters to better manage their selection process and address the training needs of individuals. Across its brands – which include Voyager Software (recruitment software UK & Australia), Dillistone FileFinder executive search software, GatedTalent, the global database of the world’s leading executives, Talentis.Global – the next generation of recruitment software and also ISV.Online, provider of online pre-employment skills testing and training tools. Dillistone Group serves thousands of clients worldwide. Ikiru People Ltd: Registration Number 02043300. Registered in England & Wales.
 |  |  |  |