iCapture
Walkthrough
The step by step instructions below are just as guidance and does not go through all options, see more information at the bottom of this topic for more in depth details.
NB: - Ensure the Infinity Outlook Connector is active within Outlook Add-ins, this will add the functionality required to upload CV's into Infinity (via iCapture)
Step 1 - Getting CV's into iCapture
NB: - Infinity has the ability to have a variety of ways to get CV's into iCapture, folder on a shared drive (not available for SaaS clients), One Drive account, directly from an exchange account or from a folder within an exchange account etc... speak to your system administrator for more details
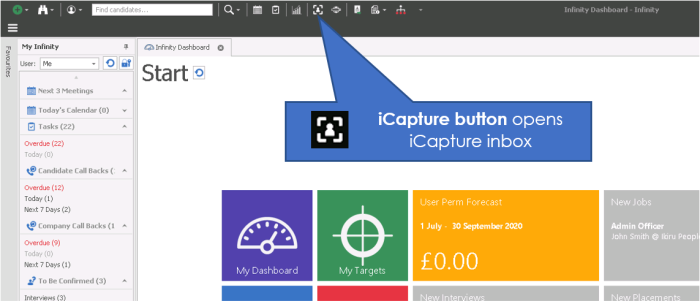
Step 2 - Open iCapture
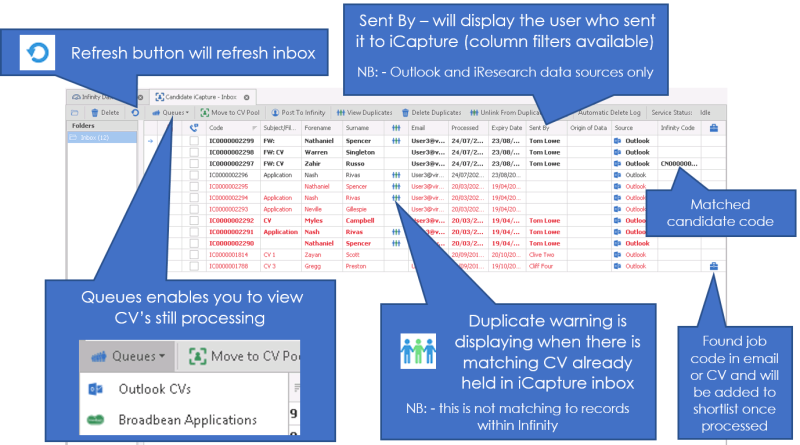
Step 3 - iCapture inbox
Step 4 - Review CV
Double click on the appropriate entry in the inbox to open it
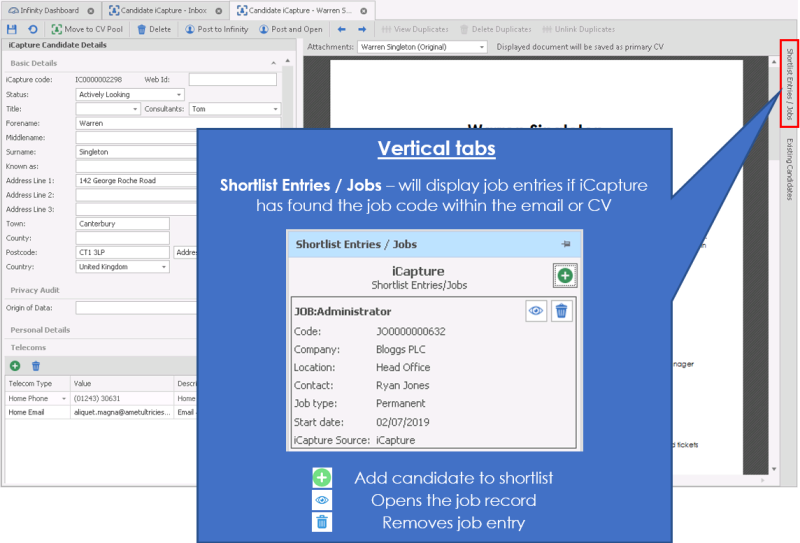
Step 5 Shortlist Entries
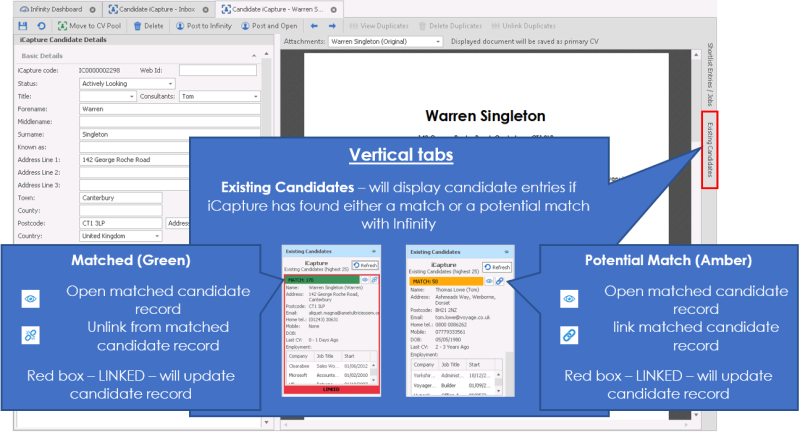
Step 6 - Existing Candidates
Step 7 - Create the Candidate Record


Need more information, click below:
iCapture is Infinity’s CV parser. These means that CV’s that are sent to iCapture will be read and you have the option to post to the database without having to manually add the candidate to Infinity,
It can be accessed through the quick access toolbar, My Infinity or the application menu.
iCapture is set to poll at a regular time period (typically every minute).
 NOTE – You do not have to use Candidate iCapture. You are able to skip Candidate iCapture and post CV’s directly to Infinity (Automatic mode)
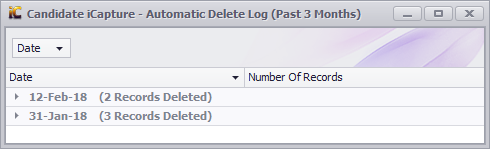
Allows you to access a log of when and how many entries have been deleted, if Auto Delete has been activated
See GDPR section for more details
See Candidate Privacy Audit section for more details
See Suppression Lists for more details
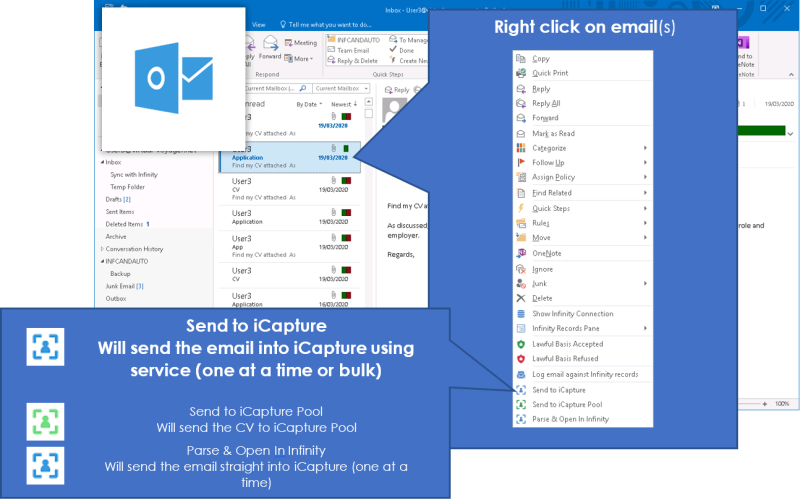
By default you should be able to send CV's into iCapture by right clicking on email messages within your Inbox (Outlook) and selecting Send to icapture, below are some addtional examples of what may also be available as methods of sending CV's into iCapture, please speak to you system administrator for more details:
- Drag and drop a CV into a folder (i.e. CV's to iCapture on desktop)
NB:- Not available for SaaS systems
- Forwarding an email to a specified mailbox
- Set up CV’s to be automatically sent to i-capture from Broadbean applications
- Process PDF’s from Linked-in or other web based resources via iResearch
- Downloading CV's into your OneDrive account
This mode will skip the check stage. You could use this mode to skip for all new CV’s and skip for existing CV’s, depending on the options chosen.
In order for a candidate to be added to Infinity as a new candidate (i.e. the database has not recognized any potential duplicates) they must match the criteria specified by your administrator in the iCapture settings. Please see separate Admin manual for iCapture settings.
If a candidate is identified as a possible duplicate, the candidate will be added to the iCapture screen for checking as described below. The settings for what is identified as a duplicate are specified by your administrator in your iCapture settings.
Move to CV Pool
The CV Pool is an area to where you are able to add candidates that you neither want to delete, or post to Infinity. The CV pool is an external ‘pot’ that you may want to post CV’s to. If a CV is in the CV pool, the candidate will not have a record created in Infinity, but you are able to search for their details. To move a CV into the pool, highlight the CV and click Move to CV Pool.
View the CV’s in the CV pool
- Application menu
- Queues
- iCapture CV pool
Queues in iCapture
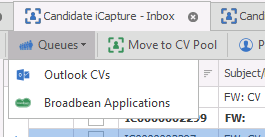
Each Queue will display candidate applications which have made through either Broadbean or Seek Job postings.
Outlook CV Button
The outlook CV’s button gives you access to a list of queued CVs sent to iCapture using the right-click “Send to iCapture” function in Outlook. As they are processed, the CVs will be removed from the list.
Broadbean Applications
If there are entries in the Queue then a user with the correct permission will be able to delete selected items (multi-selectable), or to open individual items as emails which can be viewed in a screen similar to Outlook and refresh the queue.

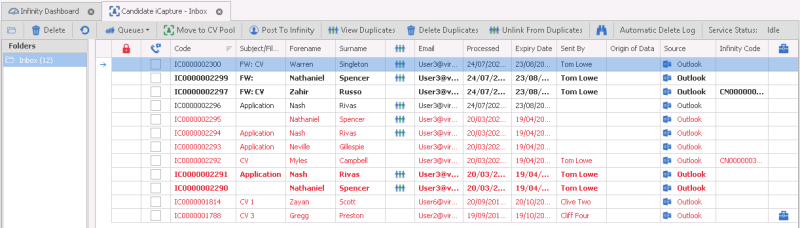
On the left hand side of the screen will be the folders that you have access to. These will have been set up by your Administrator and look for key words contained in a Cv. If iCapture find those word it will put them into the suitable folder on the left. If you have used the right click from outlook option to send CV’s to iCapture you will also be able to see your name in the Username column. Please see separate Admin Manual for further information.
On the right hand side of the screen are the different CV’s that have been received.
You are able to change the column as necessary by clicking in the title of the column, for example clicking in Surname will sort the iCapture CV’s by surname making it easier to find the candidate that you are looking for. You also have the option to use CTRL F, this will bring up a find screen that assists you in finding a candidate.

The tool bar enables you to view CV’s currently in the queue for iCapture, Check potential duplicates (Only duplicated in iCapture, not in the database) and move CV’s to the CV Pool.
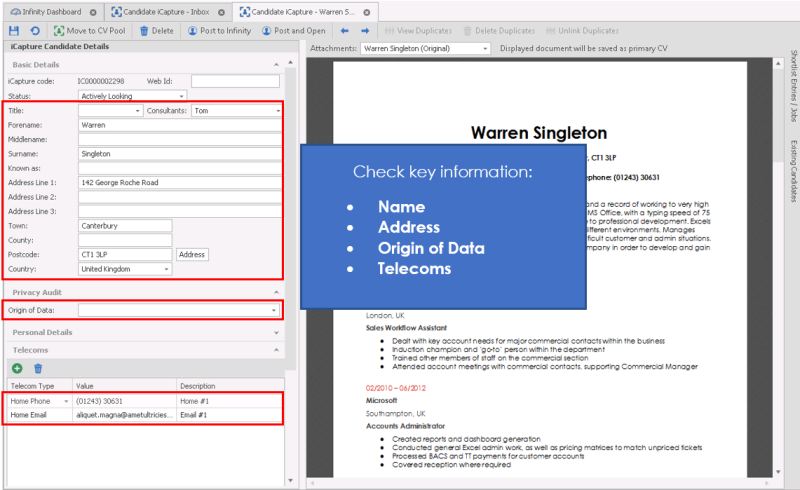
To review your CV double click on the CV. This will open the CV and show you more detail on the document.
The CV document is on the right of the screen (as the candidate has sent it) and the information that has been parsed (read) is on the left of the screen.
Check the information on the left of the screen by expanding the areas.
Adding & amending data
If there are any issues with the data, you can change it here. You can type in the fields on the left of the screen, or you can drag and drop data from the CV into the relevant fields under iCapture candidate details on the left, or right click & select the correct field from the drop down.
- Basic Details – Here you can add details such as Name and Address
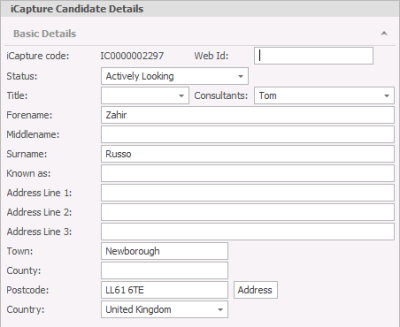
NB: - Address button required Address Lookup licence
- Origin of Data - select from the dropdown list where you have acquired the CV, see Privacy Audit section for more details
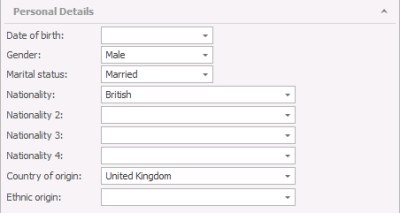
- Personal Details – If you have this info you can enter their personal details including date of birth, gender and ethnic origin.
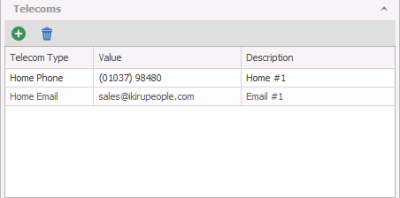
- Telecoms – Add all the contact details including telephone, mobile and email addresses
- Social Media profiles – Enter and Linked-in, Facebook or twitter profiles

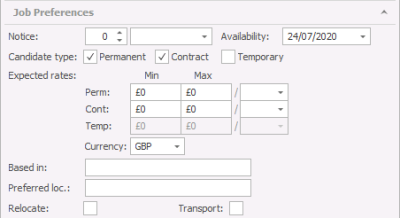
- Job Preferences – Here you can enter whether they would like Permanent or contract work and what rates they require.
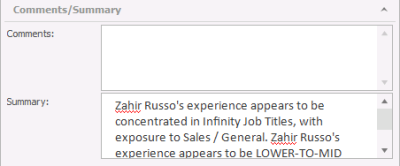
- Comments and summary – Comments are your thoughts about the candidate having spoken with them, iCapture will write a very basic summary which can be edited by the consultant.
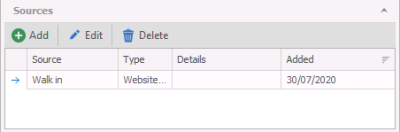
- Sources – If the CV has come via a website, iCapture will list the source here.
- Attributes – iCapture will add any words that appear in your skills dictionary, if you want to add any manually you can do so by pressing the add icon


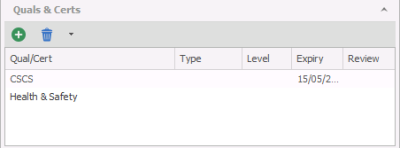
- Quals & Certs – Here you can add any qualifications or certificates that the candidate currently holds along with the expiry dates.
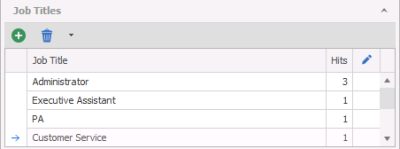
- Job Titles – If iCapture recognizes any job titles from the skills dictionary it will add them here, you can also add them manually via the add button
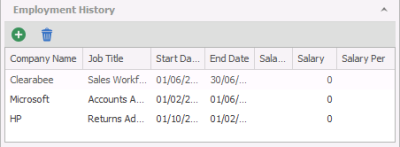
- Employment History – iCapture will read the CV and pull out the work history information, if any work history is missing you can add it via the add button and drag and drop the details into the relevant fields.
To the right of the iCapture screen there are other tabs that give other information about the candidate, the CV and how they might fit into the Infinity database.
Existing Candidates
This will show anyone who is already in the database and may be a potential duplicate candidate.
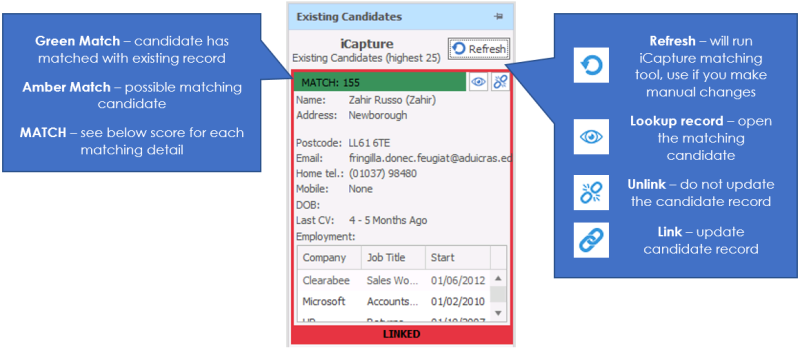
iCapture Record Matching
Each piece of data is scored according to the scoring below:
| Type | Score (Soundex) |
| Forename | 30 (5) |
| Surname | 25 (5) |
| DOB | 30 |
| Wrong DOB | -20 |
| Mobile | 50 |
| 50 | |
| Other Telecom | 20 |
| Address 1 | 15 |
| Town | 5 |
| Postcode | 25 |
| LinkedIn URL | 50 |
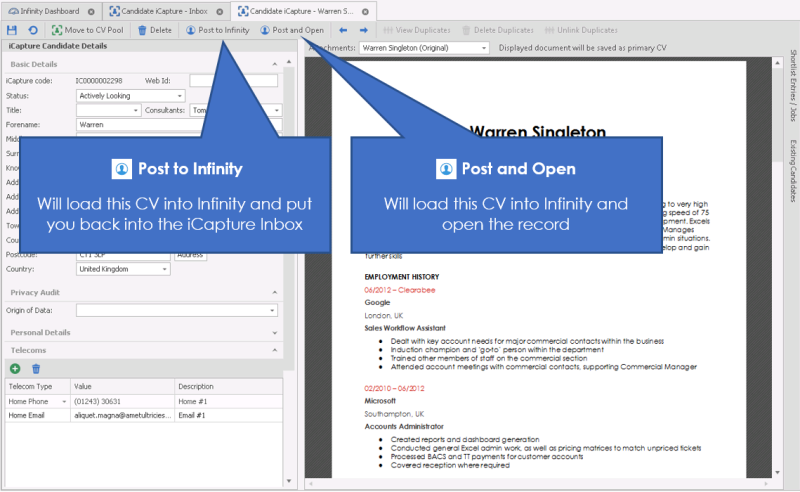
 Once you have checked the CV and the information to post, click the Post to Infinity icon and select post to Infinity. This will post the CV to Infinity and return to the iCapture inbox

Alternatively you can use the Post and Open button that will the CV to Infinity and open the new or updated candidate record

Don’t forget if you decide that the candidate is not suitable to add to your database at this time, you can send it to the CV Pool form here and bring it back at a later date
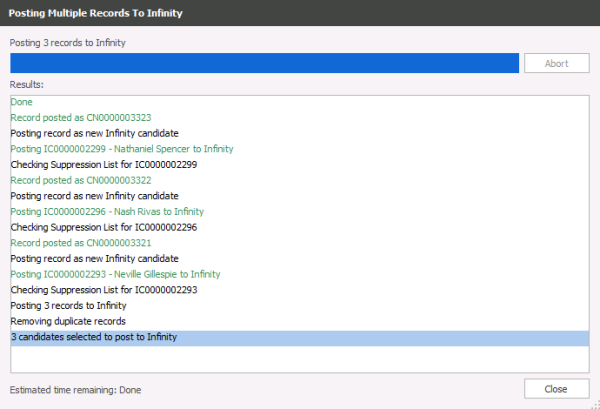
You are able to select more than one CV in the iCapture list, using shift or control keys or control A to select All and then click post to Infinity
You are warned that duplicates are removed and candidates with no names are ignored. Click “Yes”

The “Posting Multiple Records to Infinity” window opens and displays the progress.
While this is running, you will not be able to go to another Infinity window or run other Infinity functionality.
The “Abort” button will allow you to stop this functionality.

If you require further assistance please contact Ikiru People using the details published on www.ikirupeople.com
Visit our Customer Portal at https://portal.ikirupeople.com/ for future events and clinics.
If you would like to make suggestions or have found any errors with this Help section please contact our Support team.
Version 4.87
Voyager Software is a brand of Ikiru People Ltd, a subsidiary of Dillistone Group Plc. The group is a leading global provider of software and services that enable recruitment agencies and in-house recruiters to better manage their selection process and address the training needs of individuals. Across its brands – which include Voyager Software (recruitment software UK & Australia), Dillistone FileFinder executive search software, GatedTalent, the global database of the world’s leading executives, Talentis.Global – the next generation of recruitment software and also ISV.Online, provider of online pre-employment skills testing and training tools. Dillistone Group serves thousands of clients worldwide. Ikiru People Ltd: Registration Number 02043300. Registered in England & Wales.
 |  |  |  |