Voyager Infinity – Release Notes
Version: 5.0
Release Date: 13th December 2024
What have we released?
- Infinity 5.0 has been released
Release overview
Here’s a snapshot of what we’ve delivered in this release:
- Candidate Portal - Onboarding
- Leads – status changes controlled by a button on the toolbar
Feedback please
We are continuously looking to improve Voyager Infinity and are keen to hear your thoughts. Please email suggestions@ikirupeople.com with any feedback on existing functionality or ideas for new functionality.
Contents
Enhancement 126678 Infinity Candidate Portal - Onboarding
Overview
- Infinity now has a Candidate Portal, which allows candidates to log on to a portal website and populate onboarding documents.
- Onboarding is now on general release
- The Availability Module is starting its Beta roll-out.
- The candidate can access the Portal via a Phone, Tablet or Computer.
- Once the documents have been submitted, they can be verified in Infinity, and the data added to the candidate’s Infinity page.
- Onboarding Documents Available:
- Application form
- References / In Case of Emergency
- Sign Document
- GDPR Consent Document
- Upload Quals & Certs
- Upload Driving Licence
- TrustID
- Legalesign
- Info Document
- View Document
- The Candidate Portal is SaaS only
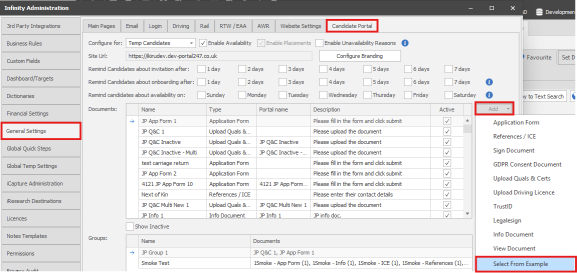
Configuring the Candidate Portal
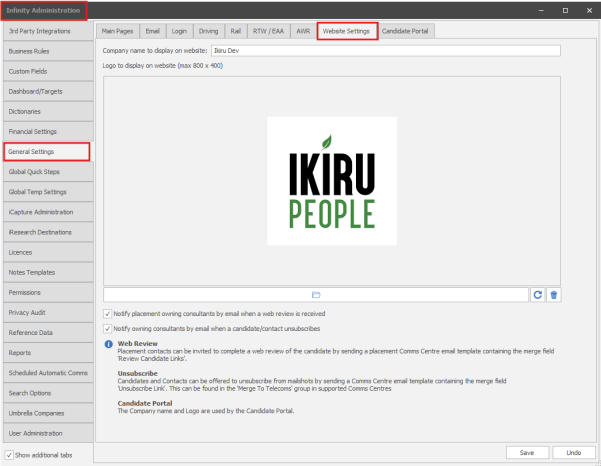
Portal Website Logo & Company Name
The Logo and Company name are taken from the ‘Website Settings’ tab.
Candidate Portal settings:
Most Portal configuration is from the ‘Candidate Portal’ tab.
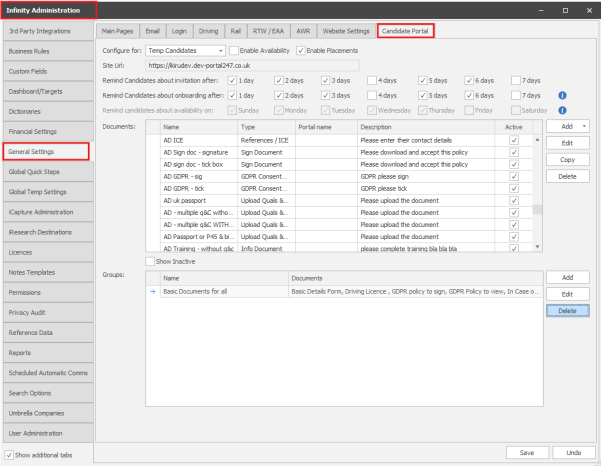
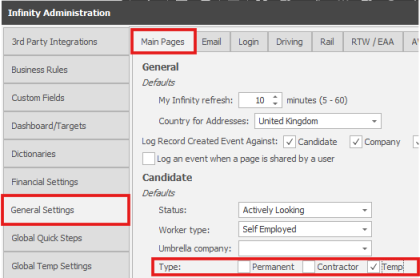
Configure for:
- The portal is configured for Temp or Contract. (Default = Temp)
Enable Availability
- Enables the Availability feature, if purchased.
Note: Availability is currently undergoing Beta testing.
Enable Placements
- Enables the Placements feature
- This is part of the Availability feature
- This is automatically enabled, if Temps availability is enabled, as Temp Availability and Placements are on the same page.
Site URL
- This is automatically populated, and displays the URL of the portal
- Note: When a candidate uses the portal for the first time, they must use the email link to initialise the portal for them. Once initialised they can access the portal via the link or the main site URL.
Invitation Reminder emails
- You can configure how frequently candidates are sent reminders, up to 7 days.
Onboarding Reminder emails
- You can configure how frequently the candidates are sent reminders, up to 7 days.
- If the candidate has not logged into the portal, they will not be sent this reminder, as the ‘invitation reminder’ will be sent instead.
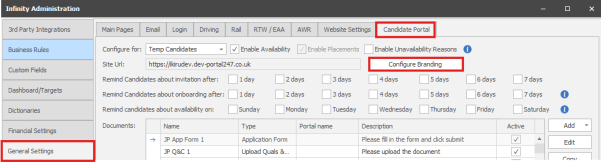
Availability Reminder emails
- When enabled, all portal candidates, who haven’t updated their availability within the last 7 days will receive the availability reminder email on the selected day/s, including those who are yet to login.
- This is sent every week.
Note: Availability is currently undergoing Beta testing.
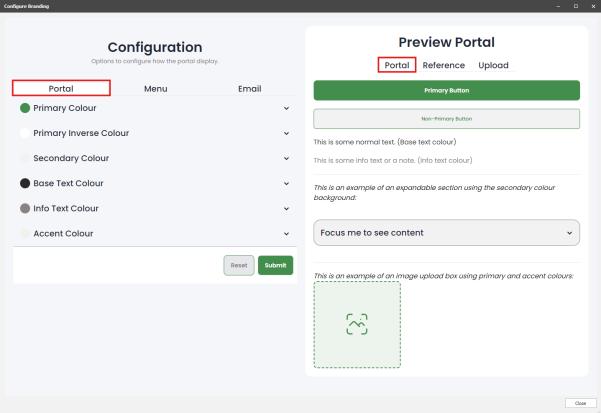
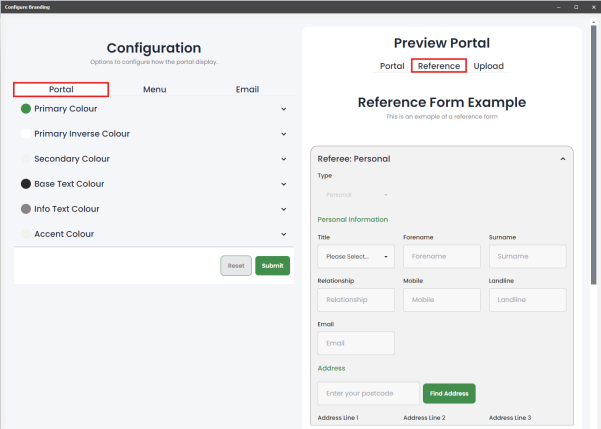
Branding
The portal can be branded with your colours
Note: When you press ‘submit’, and confirm you are happy with the changes, all candidates configured to use the portal, will see the new branding when they next click on the portal.
The portal tab shows the 6 colours used by the main portal pages, with examples of how each colour is used on the right:
 You can also see an example of a Reference using the new colours:
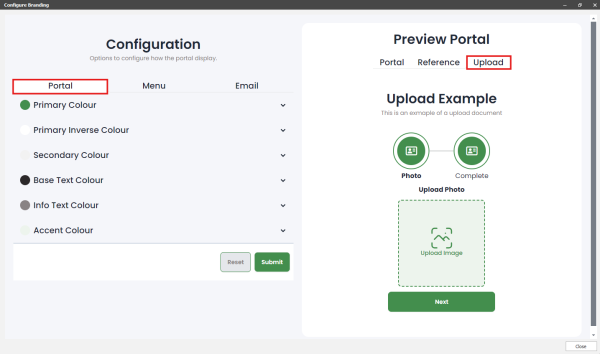
You can also see an example of an upload doc using the new colours:
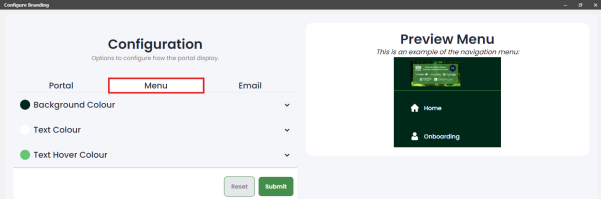
The Menu tab shows the 3 colours used by the menu, with examples of how each colour is used on the right:
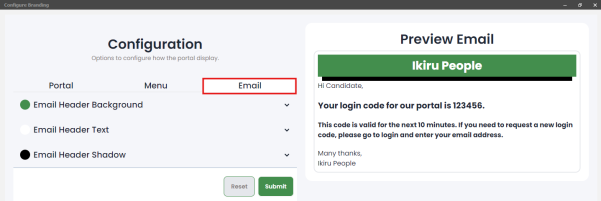
 The Email tab shows the 3 colours used by the automatic emails, with examples of how each colour is used on the right:
When you are sure you are happy with the changes, and click ‘Submit’ you are warned changes will take effect immediately:

When you click ‘Submit, the changes are stored, and candidates will see the new branding.
Configuring Documents – General
Documents are configured in Administration, before they are allocated to candidates
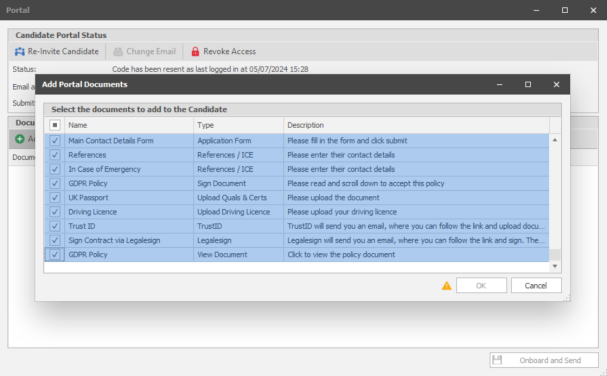
10 Document Types are available:
- Application Form
- Various forms
- Includes fields from the Infinity candidate page.
- Includes candidate custom fields.
- Includes fields that do not exist in Infinity.
- References / ICE (In Case of Emergency)
- Reference’s contact details.
- In Case of Emergency contact details.
- Sign Document
- Documents that require signing
- GDPR Consent Document
- GDPR policy if using consent.
- Upload Quals & Certs
- Upload scans/photos of documents that are stored as Quals & Certs, e.g. Identity documents, Industry specific documents.
- Upload Driving Licence.
- Upload scans/photos of Driving Licence.
- For use with the ‘Driving’ feature
- Typically non-specialist driving agencies will use ‘Quals & Certs’ to store Driving Licence details.
- TrustID
- A TrustID email is sent to the candidate by TrustID.
- The Portal can report if the TrustID process has been completed.
- This can be included as part of the onboarding process.
- Legalesign
- A Legalesign email is sent to the candidate by Legalesign.
- The Portal can report if the Legalesign process has been completed.
- This can be included as part of the onboarding process.
- Info Document
- This is a document included as part of the onboarding process, but not completed via the portal
- The portal can explain how to complete the task e.g. via a separate email
- View Document
- Documents that the candidate needs access to, but are not required to sign, can be made available via the portal.
Add Document
- Multiple documents of each type can be added
- Each document must have a unique name
- Documents can be created from examples
Edit Document
- Once the document has been allocated to a candidate, most fields cannot be edited.
- If you remove the document from all candidates, you will be allowed to edit it in the Administration screen.
Copy Document
- Documents can be copied
- If a document has been allocated to candidates, a copy can be taken, and the copy edited.
Delete Document
- Documents can be deleted if they are not allocated to candidates
Active tick box
- Documents can be made inactive
- Only active documents can be allocated to candidates
- Inactive documents previously allocated to candidates can still be populated.
Configuring Documents – Application Form
Application Forms allow the creation of various forms, containing:
- Fields from the Infinity candidate page.
- Candidate custom fields.
- Fields that do not exist in Infinity.
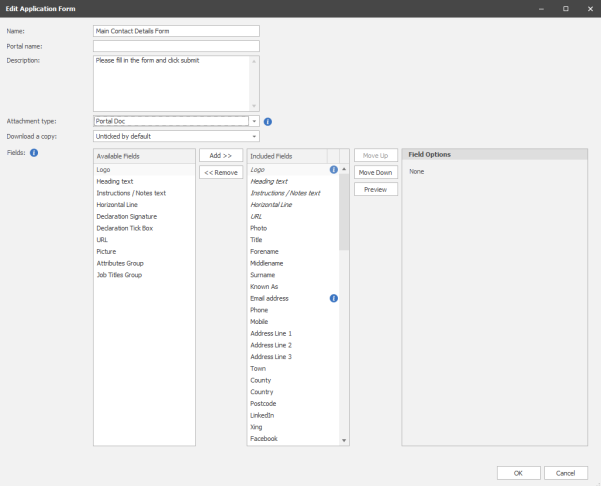
Name
- Each Document must have a unique name.
- The name field can be used for version control e.g. Main Contact Details Form v1, Main Contact Details Form v2. These can both have the same Portal Name (see below)
Portal Name
- The Name the candidate sees on the Portal
Description
- The candidate sees the description on the list of documents on the portal.
- The candidate also sees the description when populating the individual document.
Attachment Type
- Used when the document has been populated by the candidate and is added to the candidate page.
- This is optional.
- Candidate attachments can be filtered by Attachment Type, so this would be useful for candidates with lots of documents / attachments.
- Attachment Types can be added and configured for use by candidates in Administration – Reference Data – Attachment Types.
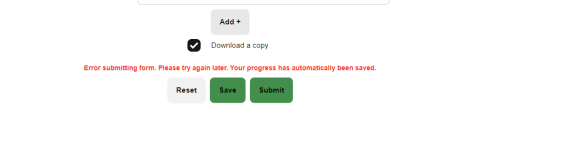
Download a Copy
- There is a ‘Download a Copy’ option on the bottom of the document, for the candidate to store a copy of what they have entered.
- This can be set in the document to default to On / Off / Mandatory.
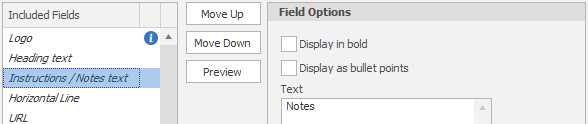
Fields - General
- The left-hand section shows the available fields.
- The middle section shows the fields included on the application form.
- Add / Remove buttons are used to move ‘Available fields’ to the ‘Included fields’ list.
- Double-clicking an ‘Available field’ moves it to the ‘Included fields’
- If an ‘Included field’ is selected, any newly added fields will appear below.
- Move Up / Move Down control the order the fields appear in the application form.
- The right-hand section shows ‘Field Options’.
- Some fields only have an option for ‘Mandatory’.
- Some fields have more options.
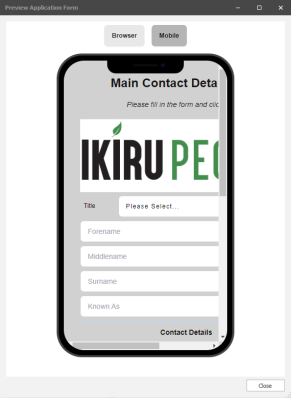
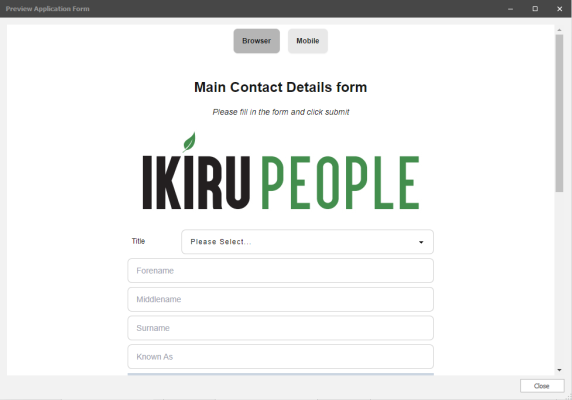
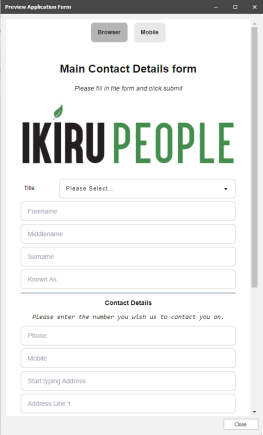
Preview
- Shows what the Application Form will look like when the candidate views it.
- Browser / Mobile buttons give two different views.
Note: Mobiles, Tablets and Computers all have different resolutions. The preview gives an example of one mobile phone resolution, but is not an emulator, so it’s recommended to test on a real phone, before inviting your candidates.
Fields – Logo / Heading / Instructions / Horizontal Line
These four fields can be added as many times as required.
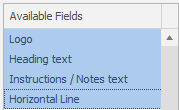
- Logo – Displays a logo on the Application Form.
- Heading text – This allows the application form to be split up with various headings.

- Instructions / Notes text – These can be added as required on the application form.
- They can optionally be set and ‘bold’ and/or ‘bullet points’
- Horizontal Line – This allows the application form to be split up into sections.
An Example of how the four fields appear in a browser is shown below.
Fields – Candidate page fields
Most candidate page fields can only be added once per application form.
Most candidate fields have a ‘mandatory’ ‘Field option’.
- Mandatory fields appear in bold in the ‘Included Fields ‘list
Some candidate fields have additional ‘Field options’.
List of fields:
- Declaration Signature
- Multiple Declaration Signatures can be added.
- This provides a box for the candidate to Sign the form, and the date/time is logged.
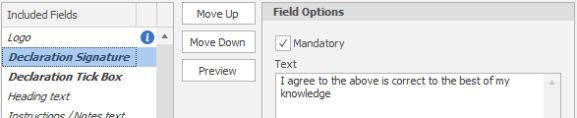
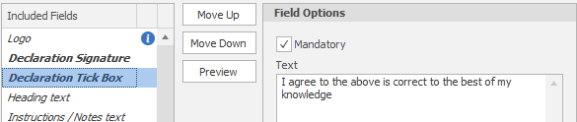
- Declaration Tick Box
- Multiple Declaration Tick Boxes can be added.
- This provides a tick box for the candidate to agree to the form, and the date/time is logged.
- URL
- Multiple URLs can be added.

- Picture
- Multiple Pictures can be added
- If ‘Display full width’ is disabled, the picture would be the size of a typical logo.
- If ‘Display full width’ is enabled, the picture fills the width of the screen.

- Photo
- Allows the candidate to upload their photo.
- Title
- Forename
- Surname
- Known As
- Email Address
- The email address cannot be edited by the candidate and is for display purposes only.
- Phone
- Mobile
- Address Line 1
- Address Line 2
- Address Line 3
- Town
- County
- Country
- Postcode
- Summary
- Attributes Group
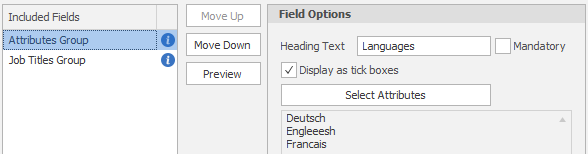
- Multiple Attribute Groups can be added.
- ‘Display as tick boxes’ works best when there are only a small number of Attributes.
- Attribute names can be configured to display differently on the portal than they do in Infinity
- Administration – Dictionaries – Attributes – The grid of Attributes has a ‘Portal Name’ column.
- If the Portal Name is blank, the attribute name is used.
- Job Titles Group
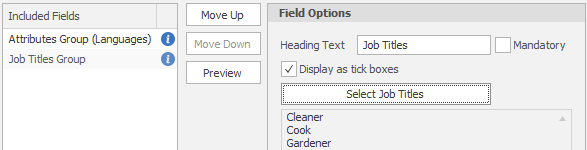
- Multiple Attribute Groups can be added.
- ‘Display as tick boxes’ works best when there are only a small number of Job Titles.
- Job Title names can be configured to display differently on the portal than they do in Infinity
- Administration – Dictionaries – Job Titles – The grid of Job Titles has a ‘Portal Name’ column.
- If the Portal Name is blank, the Job Title name is used.
- Preferred Job Title
- The preferred job title must be from the list selected in the Job Titles Group.
- Source
- Job Type

- Perm Expected Rate

- Cont Expected Rate

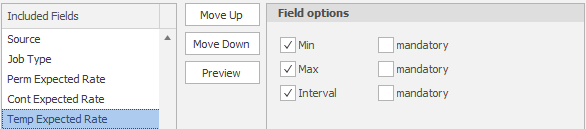
- Temp Expected Rate
- Employment History
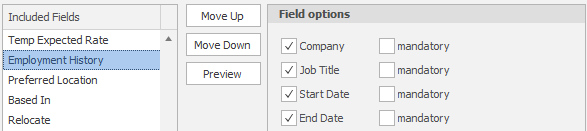
- Employment History – No Gaps
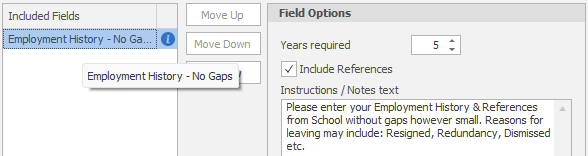
- Employment History has multiple fields: Company, Job Title, Date From (Day/Month/Year) and Date To (Day/Month/Year), Reason for Leaving, Reference Title, Forename, Surname, Job Title, Email
- It is optional for references to be included as well as Employment History.
- The candidate must populate this for the number of years as set in ‘Years required’, with no gaps within the ‘years required’.
- Preferred Location
- Based In
- Relocate
- Transport
- Notice

- Student Visa
- Date of Birth
- Nationalities
- Gender
- Ethnic Origin
- Marital Status
- Country of Origin
- Worker Type
- National Insurance Number
- Start Date
- Bank

- Limited Company

- CIS

- Back Office Ref
- Back Office Custom Code
- Back Office Secondary Code
- Name History

- Name History has multiple fields: Title, Forename, Middlename, Surname, Date From (Month/Year) and Date To (Month/Year).
- The candidate must populate this from Birth, without gaps.
- Name History Fields do not exist in Infinity. These fields are stored in a pdf attachment on the candidate page.
- Address History
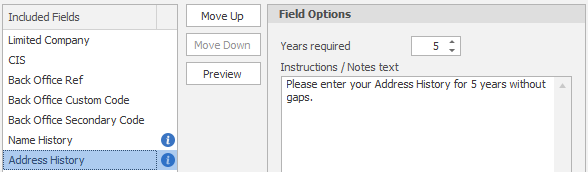
- Address History has multiple fields: Address, Date From (Month/Year) and Date To (Month/Year)
- The candidate must populate this for the number of years as set in ‘Years required’ without gaps.
- Address History Fields do not exist in Infinity. These fields are stored in a pdf attachment on the candidate page.
When an application form has been added to a candidate, only the following fields are editable:
- Name
- Description
- Attachment type
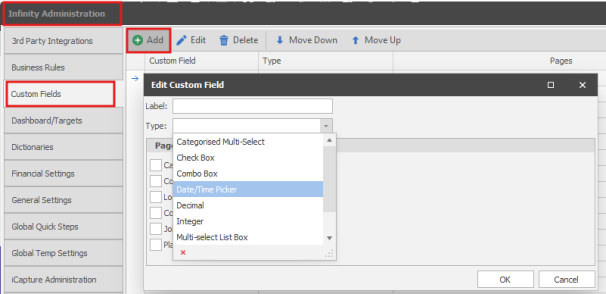
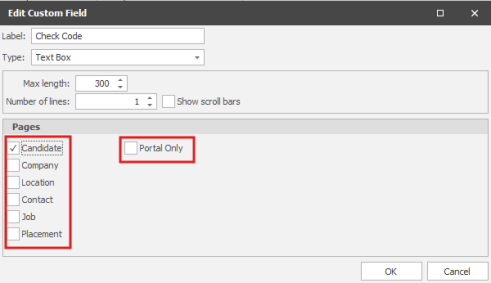
Fields – Custom Fields (Infinity/Portal and Portal Only)
The following types of custom fields are supported by the Portal:
- Check Box
- Combo Box
- Date/Time Picker
- Decimal
- Integer
- Multi-select List Box
- Text Box
Custom fields can be created in the administration screen:
Standard custom fields that exist on the ‘Custom’ tab of the candidate page can be populated by the portal.
- These fields will have ‘candidate’ ticked on the Custom Field. (as shown in the screenshot below)
Custom fields can also be set as ‘Portal Only’ which means they do not exist on the candidate page but can exist on the portal.
- These fields will have ‘Portal Only’ ticked on the Custom Field. (as shown in the screenshot below)
- Because these fields do not exist in Infinity they are only stored in a pdf attachment on the candidate page.
- A common use of these fields is a questionnaire.
- Can have up to 500 Characters in the label, and in the values.

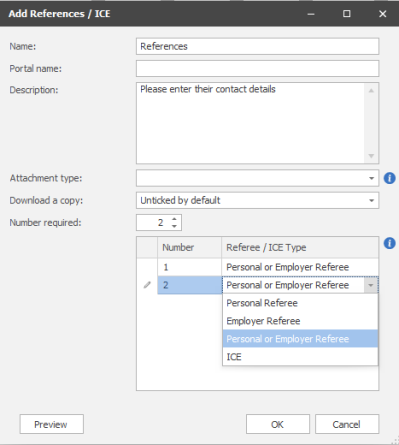
Configuring Document – References / ICE (In Case of Emergency)
References / ICE documents allow the candidate to populate:
- Reference’s contact details.
- In Case of Emergency contact details.
Name
- Each Document must have a unique name.
- The name field can be used for version control e.g. Doc v1, Doc v2. These can both have the same Portal Name (see below)
Portal Name
- The Name the candidate sees on the Portal
Description
- The candidate sees the description on the list of documents on the portal.
- The candidate also sees the description when populating the individual document.
Attachment Type
- Used when the document has been populated by the candidate and is added to the candidate page.
- This is optional.
- Candidate attachments can be filtered by Attachment Type, so this would be useful for candidates with lots of documents / attachments.
- Attachment Types can be added and configured for use by candidates in Administration – Reference Data – Attachment Types.
Download a Copy
- There is a ‘Download a Copy’ option on the bottom of the document, for the candidate to store a copy of what they have entered.
- This can be set in the document to default to On / Off / Mandatory.
Number required
- Can be 1 or greater. (Default = 1)
- References default to type ‘Personal or Employer Referee’.
- Each reference can be configured as:
- ‘Personal Referee’
- ‘Employer Referee’
- Personal or Employer Referee
- The candidate will need to choose Personal or Employer when adding the reference to the Portal
- ICE (In Case of Emergency)
- It is not recommended for References and ICE to be used in the same document
Preview
- Shows what the Reference will look like when the candidate views it.
- Browser / Mobile buttons give two different views.
Note: Mobiles, Tablets and Computers all have different resolutions. The preview gives an example of one mobile phone resolution, but is not an emulator, so it’s recommended to test on a real phone, before inviting your candidates.
When a Reference / ICE document has been added to a candidate, only the following fields are editable:
- Name
- Description
- Attachment type
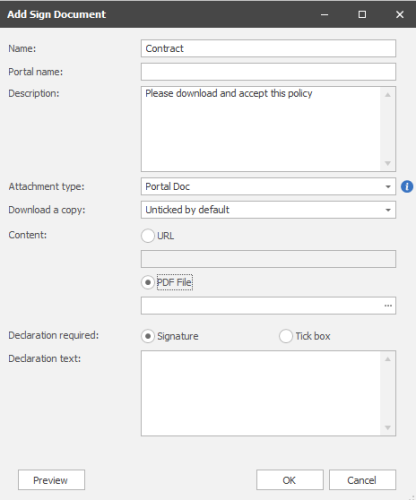
Configuring Documents – Sign Document
Sign Documents allow the candidate to sign a document via a signature or tick box
Name
- Each Document must have a unique name.
- The name field can be used for version control e.g. Doc v1, Doc v2. These can both have the same Portal Name (see below)
Portal Name
- The Name the candidate sees on the Portal
Description
- The candidate sees the description on the list of documents on the portal.
- The candidate also sees the description when populating the individual document.
Attachment Type
- Used when the document has been populated by the candidate and is added to the candidate page.
- This is optional.
- Candidate attachments can be filtered by Attachment Type, so this would be useful for candidates with lots of documents / attachments.
- Attachment Types can be added and configured for use by candidates in Administration – Reference Data – Attachment Types.
Download a Copy
- There is a ‘Download a Copy’ option on the bottom of the document, for the candidate to store a copy of what they have entered.
- This can be set in the document to default to On / Off / Mandatory.
Content
- One of the following can be selected:
- URL – Links to a page on a website.
- PDF File – A specific pdf file can be added.
Declaration required
- Signature – The candidate will need to sign a box.
- Tick box – The candidate will need to tick a box.
Declaration text
- The declaration appears above the signature or next to the tick box, so the candidate is aware of what they are agreeing to.
Preview
- Shows what the Sign Document will look like when the candidate views it.
- Browser / Mobile buttons give two different views.
Note: Mobiles, Tablets and Computers all have different resolutions. The preview gives an example of one mobile phone resolution, but is not an emulator, so it’s recommended to test on a real phone, before inviting your candidates.
When a Sign Document has been added to a candidate, only the following fields are editable:
- Name
- Description
- Attachment type
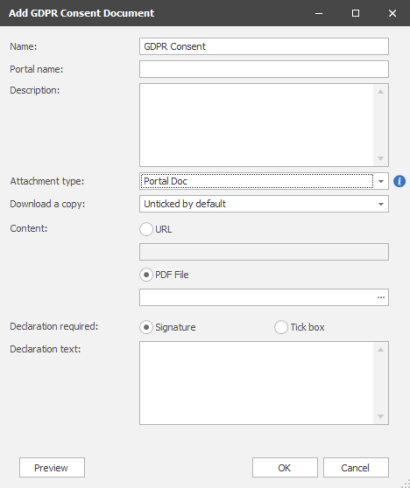
Configuring Documents – GDPR Consent Document
GDPR Consent Documents allow the candidate to sign the GDPR Consent policy via a signature or tick box
Name
- Each Document must have a unique name.
- The name field can be used for version control e.g. Doc v1, Doc v2. These can both have the same Portal Name (see below)
Portal Name
- The Name the candidate sees on the Portal
Description
- The candidate sees the description on the list of documents on the portal.
- The candidate also sees the description when populating the individual document.
Attachment Type
- Used when the document has been populated by the candidate and is added to the candidate page.
- This is optional.
- Candidate attachments can be filtered by Attachment Type, so this would be useful for candidates with lots of documents / attachments.
- Attachment Types can be added and configured for use by candidates in Administration – Reference Data – Attachment Types.
Download a Copy
- There is a ‘Download a Copy’ option on the bottom of the document, for the candidate to store a copy of what they have entered.
- This can be set in the document to default to On / Off / Mandatory.
Content
- One of the following can be selected:
- URL – Links to a page on a website.
- PDF File – A specific pdf file can be added.
Declaration required
- One of the following can be selected:
- Signature – The candidate will need to sign a box.
- Tick box – The candidate will need to tick a box.
Declaration text
- The declaration appears above the signature or next to the tick box, so the candidate is aware of what they are agreeing to.
Preview
- Shows what the GDPR Form will look like when the candidate views it.
- Browser / Mobile buttons give two different views.
Note: Mobiles, Tablets and Computers all have different resolutions. The preview gives an example of one mobile phone resolution, but is not an emulator, so it’s recommended to test on a real phone, before inviting your candidates.
When a GDPR Consent Document has been added to a candidate, only the following fields are editable:
- Name
- Description
- Attachment type
Configuring Documents - Upload Quals & Certs
Upload Quals & Certs allow candidates to upload photos/scans of documents.
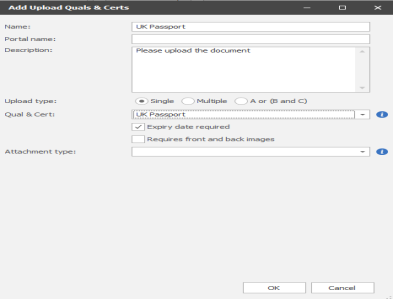
Single
One specific quals & certs is to be uploaded.
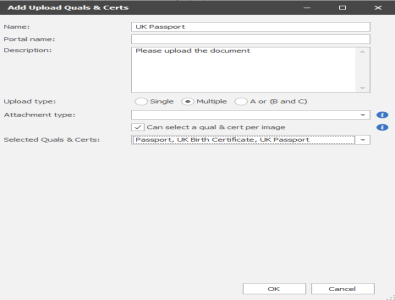
Multiple
Any number of Quals & Certs can be uploaded.
Optionally, the candidate can select a quals & certs from a predefined list.
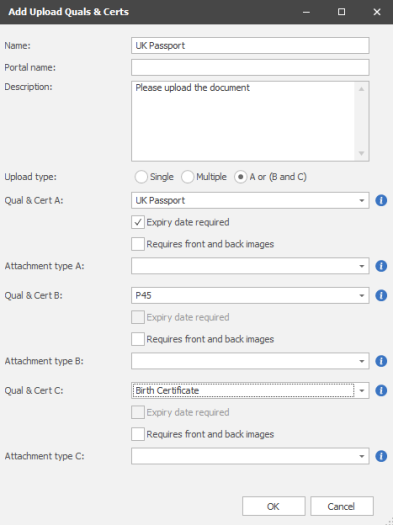
A or (B and C)
The candidate must upload qualification A (e.g. Passport), or they must upload qualification B (e.g. P45) and qualification C (e.g. Birth Certificate)
Name
- Each Document must have a unique name.
Description
- The candidate sees the description on the list of documents on the portal.
- The candidate also sees the description when populating the individual document.
Quals & Cert
- Used when the document has been populated by the candidate and the Quals & Cert is added to the candidate page.
- This is Optional
Expiry date required
- If a Quals & Cert with an expiry date is selected, the ‘Expiry date required’ field is ticked by default but can be unticked.
- If ticked the candidate is required to populate an expiry date field as well as upload the photo/scan.
- If un-ticked the expiry date field is not displayed to the candidate. The consultant can populate the field when verifying the information the candidates’ photos/scans.
Requires front and back images
- Photos/scans of both sides of the document are required.
Attachment Type
- Used when the document has been populated by the candidate and is added to the candidate page.
- This is optional.
- Candidate attachments can be filtered by Attachment Type, so this would be useful for candidates with lots of documents / attachments.
- Attachment Types can be added and configured for use by candidates in Administration – Reference Data – Attachment Types.
- If the Quals & Cert has been configured against attachments, the attachment type is selected.
- If it’s configured against one attachment type, it is displayed and not editable.
- If it’s configured against multiple attachment types, the user can select which one to use. It defaults to the first one.
Preview
- Shows what the Upload Document will look like when the candidate views it.
- Browser / Mobile buttons give two different views.
Note: Mobiles, Tablets and Computers all have different resolutions. The preview gives an example of one mobile phone resolution, but is not an emulator, so it’s recommended to test on a real phone, before inviting your candidates.
When an Upload Quals & Certs doc has been added to a candidate, only the following fields are editable:
- Name
- Description
- Attachment type
Configuring Documents - Upload Driving Licence
Upload Driving Licence documents allow candidates to upload photos/scans of their driving licence.
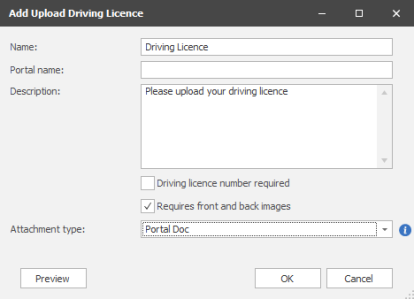
Name
- Each Document must have a unique name.
- The name field can be used for version control e.g. Doc v1, Doc v2. These can both have the same Portal Name (see below)
Portal Name
- The Name the candidate sees on the Portal
- The candidate sees the description on the list of documents on the portal.
- The candidate also sees the description when populating the individual document.
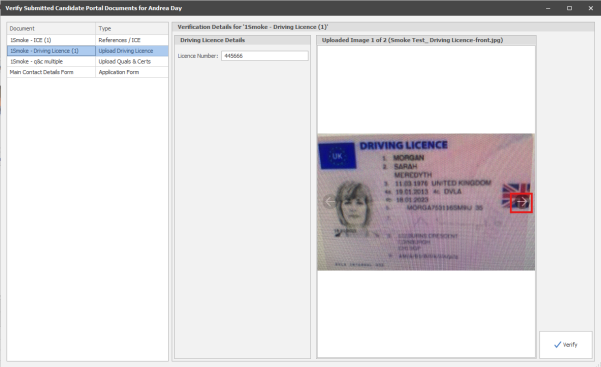
Driving licence number required
- If ticked the candidate is required to populate their Driving licence number as well as upload the photo/scan.
- If un-ticked the candidate is not required to populate the Driving licence number field. The consultant can populate the field when verifying the information the candidates’ photos/scans.
Requires front and back images
- Photos/scans of both sides of the document are required.
Attachment Type
- Used when the document has been populated by the candidate and is added to the candidate page.
- This is optional.
- Candidate attachments can be filtered by Attachment Type, so this would be useful for candidates with lots of documents / attachments.
- Attachment Types can be added and configured for use by candidates in Administration – Reference Data – Attachment Types.
Preview
- Shows what the Driving Licence will look like when the candidate views it.
- Browser / Mobile buttons give two different views.
Note: Mobiles, Tablets and Computers all have different resolutions. The preview gives an example of one mobile phone resolution, but is not an emulator, so it’s recommended to test on a real phone, before inviting your candidates.
When an Upload Driving Licence doc has been added to a candidate, only the following fields are editable:
- Name
- Description
- Attachment type
Configuring Documents - TrustID
TrustID can be initiated at the same time as other documents
- A TrustID email is sent to the candidate by TrustID, as per existing TrustID functionality.
- The Portal can report if the TrustID process has been completed.
- This can be included as part of the onboarding process, so the candidate is aware that there is a TrustID process that needs completing.

- TrustID is only available on databases configured for TrustID with verified usernames and passwords, in the Infinity Administration screen.
When an TrustID Document has been added to a candidate, All fields are editable:
- Name
- Description
Configuring Documents – Legalesign
Legalesign can be initiated at the same time as other documents
- A Legalesign email is sent to the candidate by Legalesign, as per existing Legalesign functionality.
- The Portal can report if the Legalesign process has been completed.
- This can be included as part of the onboarding process, so the candidate is aware that there is a Legalesign process that needs completing.
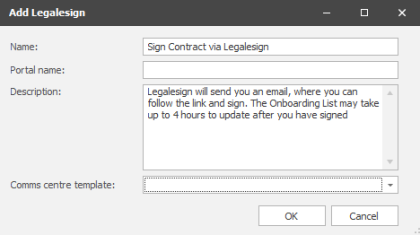
- Legalesign is only available on databases configured for Legalesign in the Infinity Administration screen.
When a Legalesign document has been added to a candidate, All fields are editable:
- Name
- Description
- Comms centre template
Configuring Documents – Info Document
- This is a document included as part of the onboarding process, but not completed via the portal
- The portal can explain how to complete the task e.g. via a separate email
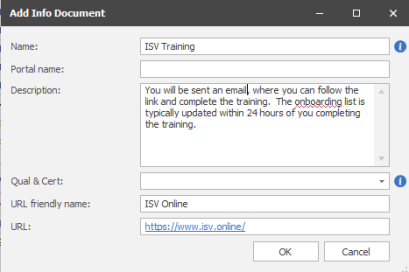
Name
- Each Document must have a unique name.
- The name field can be used for version control e.g. Doc v1, Doc v2. These can both have the same Portal Name (see below)
Portal Name
- The Name the candidate sees on the Portal
Description
- The candidate sees the description on the list of documents on the portal.
- The candidate also sees the description when populating the individual document.
Quals & Cert
- Used when the document has been populated by the candidate and the Quals & Cert is added to the candidate page.
- This is Optional
When an info document has been added to a candidate, All fields are editable:
- Name
- Description
- Quals & Cert
Configuring Documents – View Document
View Documents are Documents that the candidate needs access to but are not required to sign.
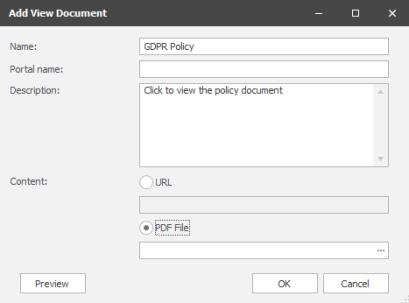
Name
- Each Document must have a unique name.
- The name field can be used for version control e.g. Doc v1, Doc v2. These can both have the same Portal Name (see below)
Portal Name
- The Name the candidate sees on the Portal
Description
- The candidate sees the description on the list of documents on the portal.
- The candidate also sees the description when populating the individual document.
Content
- One of the following can be selected:
- URL – Links to a page on a website.
- PDF File – A specific pdf file can be added.
Preview
- Shows what the View Document will look like when the candidate views it.
- Browser / Mobile buttons give two different views.
Note: Mobiles, Tablets and Computers all have different resolutions. The preview gives an example of one mobile phone resolution, but is not an emulator, so it’s recommended to test on a real phone, before inviting your candidates.
When a View Document has been added to a candidate, All fields are editable:
- Name
- Description
- Content
Configuring Document Groups
Documents can be grouped together to make it easier to allocate a list of documents to a candidate.
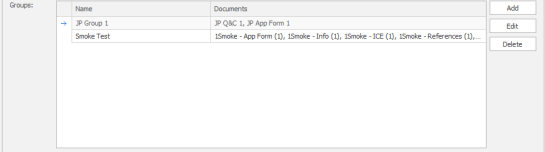
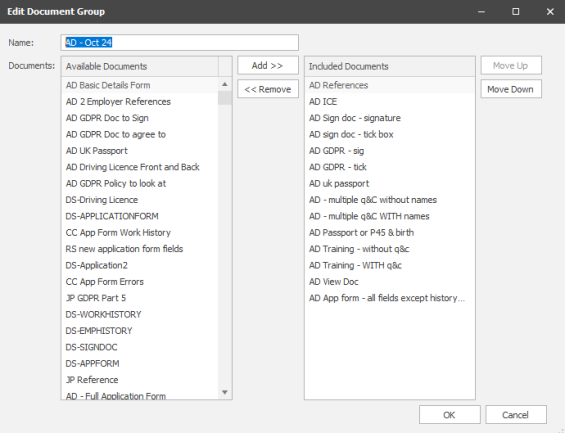
- The same document can appear in more than one document group.
- Documents within a document group can be ordered. This is the order they will appear on the candidate page and the order they will appear on the portal.
Inviting Candidates
Candidates can be invited to use the portal at the same time as they are invited for onboarding, or separately.
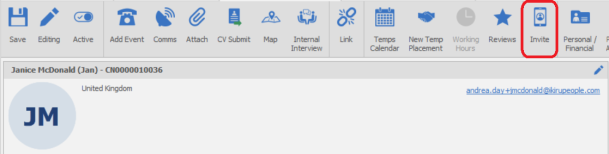
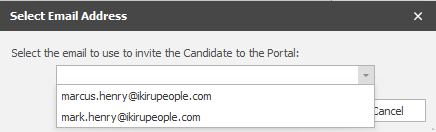
- Candidate is invited via one ‘home’ email address.
- If the candidate has more than one email address, the ‘home’ email set as ‘send as default’ is used.
- If more than one ‘home’ email’ set as ‘send as default’, the consultant is asked to select the correct one.
- The candidate must be marked as Temp/Cont as appropriate
- If the portal is configured for ‘Temps’, candidates must be marked as ‘Temp’ before they can be invited to use the portal.
- If the portal is configured for ‘Contract’, candidates must be marked as ‘Contract’ before they can be invited to use the portal.
- If the candidate does not have Temp/Cont ticked as appropriate, the ‘Invite’ button will be greyed out.
- Infinity can be configured for all new candidates to default to temp/cont/perm, if appropriate.
- Users require the ‘Portal Invite’ permission to invite a candidate to use the portal. (The Infinity Users security role has this permission by default).
- Users without the permission will see the ‘Invite’ button greyed out.
- Per database, it is not possible to invite a candidate to use the portal, if their email address is already in use on the portal by another candidate. e.g. duplicate candidates.
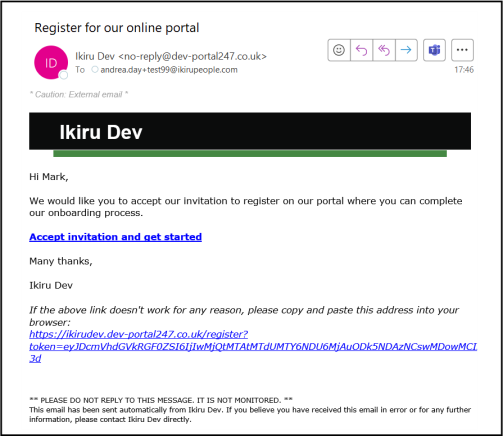
- The Invite Email is automatically sent as soon as the ‘Invite’ button is clicked.
- The Email contains a URL specific to the candidate
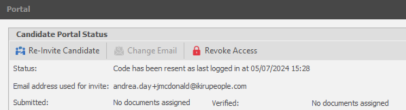
- The email can be resent via the ‘Re-invite Candidate’ button
Note: This first time the candidate logs in they must use the link in the email they are sent.
- A ‘Portal Invite’ event is automatically logged

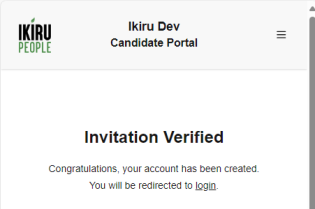
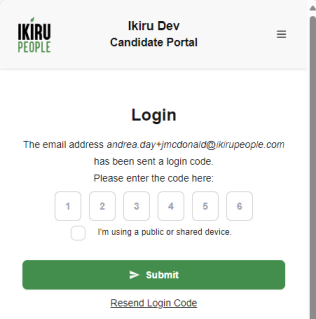
- When the user clicks the link in the email, they are taken to the website.
- The invitation is verified, and you are taken to the screen to enter the code.
- The user presses ‘Send Login Code’ to be sent the code.
- The code is emailed to the candidate and lasts for 10 minutes
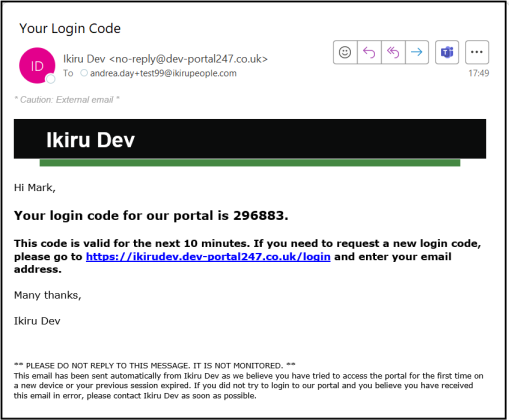
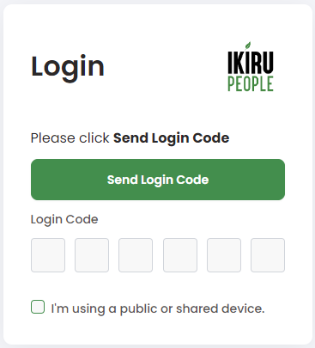
- The user enters the code and logs in
- Codes can be copied and pasted, or typed in.
- A ‘Portal Code Sent’ event is automatically logged

- When the code is entered into the Portal, they are logged in
- The Infinity candidate page changes to ‘Portal’
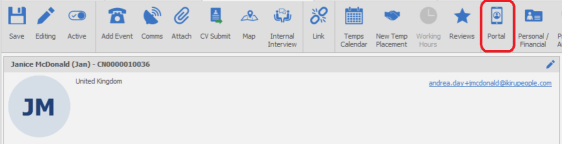
- The correct code is required to login
- The candidate’s portal screen displays:
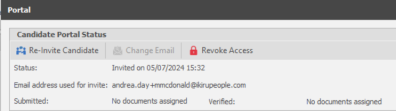
- If a code has been set, but they are yet to use it.
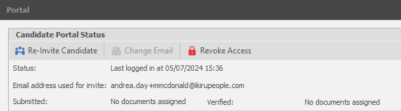
- If the code has been used and they have successfully logged on.
Re-login
- If the candidate has logged in on that device in the last 10 days, they are not required to re-login and re-enter a code.
- If the candidate hasn’t logged in on that device in the last 10 days, they are required to login and re-enter a code.
- A new code is sent
- An event is logged – Portal Code Sent.
Logout
- If the candidate logs out, they require a code to login again.
Different Device
- If the candidate logs into a different device:
- A code is sent
- An event is logged.
- Candidates can maintain concurrent sessions on multiple devices.
Onboarding candidates
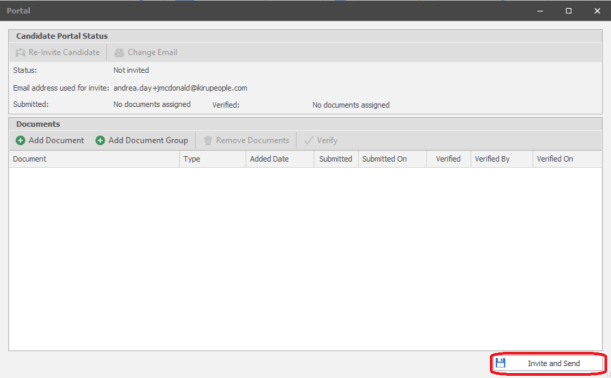
Onboarding documents can be added to a candidate after they have been invited.
Onboarding documents can also be added to the candidate at the same time as they are invited.
- From the Candidate page Portal screen, click ‘Add Document’, Select the documents, and click ‘Onboard and Send
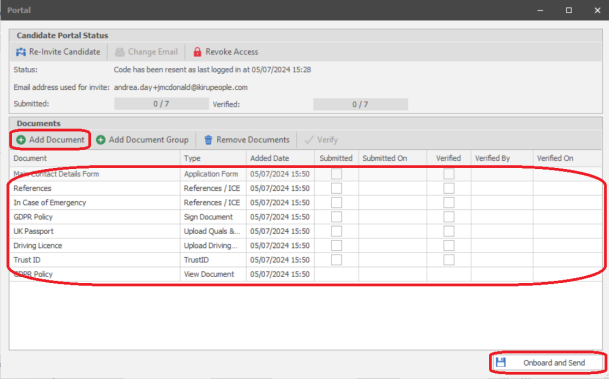
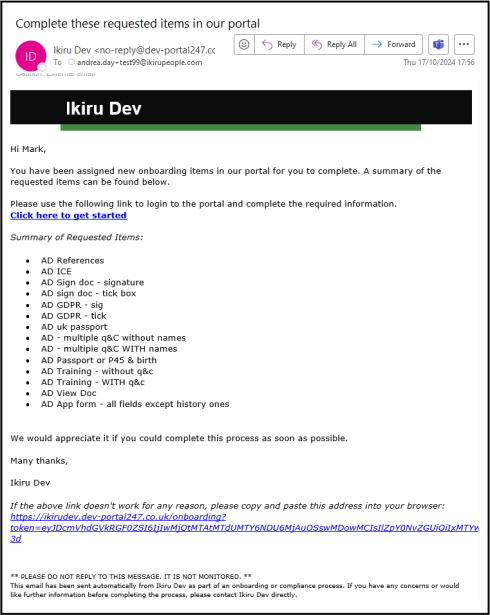
- The Onboarding Email is automatically sent as soon as the ‘Onboard and Send’ button is clicked.
- The Email contains a link to the onboarding page
- A ‘Onboarding Doc Added’ event is automatically logged, which lists the documents that were added

- When the user clicks the link in the email, they are taken to the website onboarding page.
- If they have logged in within the last 10 days, they are not required to re-login.
- Documents can be added at any time.
- Added date is recorded
- Users require the ‘Onboarding Document Add’ permission to add documents to candidates. (The Infinity Users security role will have this permission by default)
- Users without the permission will see the ‘Add Document’ button greyed out.
- Documents can be added via a document group, to easily add multiple documents at the same time
- Multiple documents of the same type can be added e.g. two application forms with different names
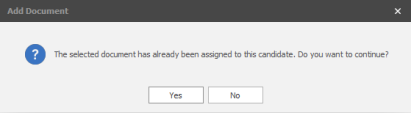
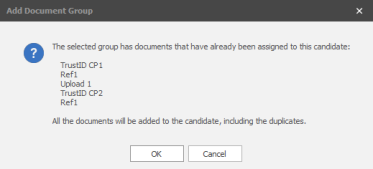
- Two identical documents can be added, e.g. if there was a problem with first document, and the candidate needs to submit it again.
- The user is warned that the document is already assigned to the candidate, and asked if they want to add it again.
- These could be added individually
- These could be added via a document group
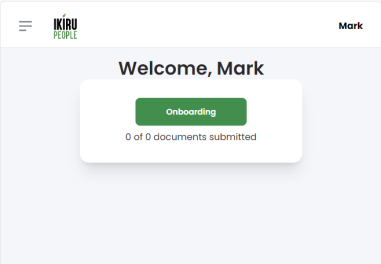
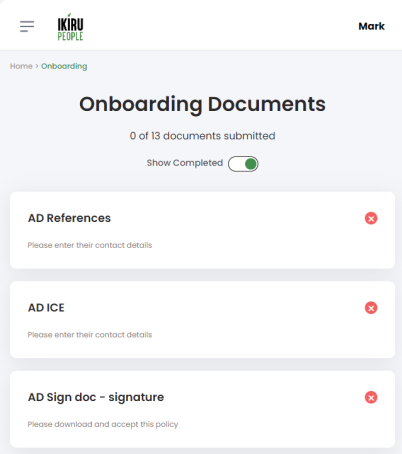
Candidate Portal – Onboarding page
The Onboarding page lists the candidates’ documents
- Each document has a Name and a Description
- ‘Show Completed’, can be disabled, so the candidate only sees the documents they have yet to complete
- All documents except ‘View Document’ have a tick/cross to indicate if they have been submitted.
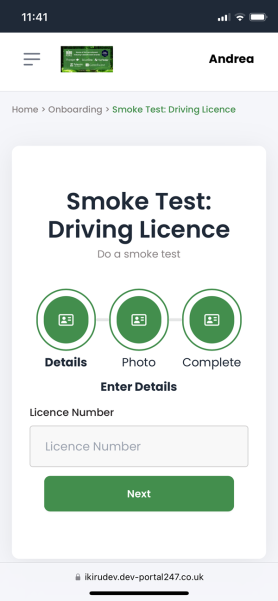
Candidate Portal – Application Form
To open an Application Form, click on the document from the onboarding page
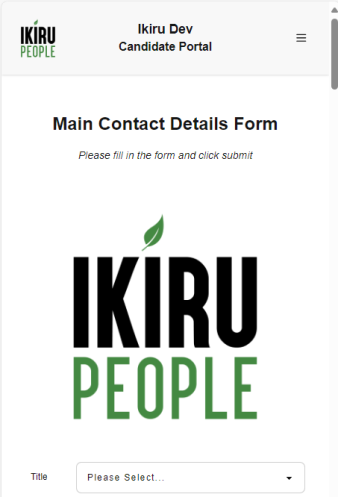

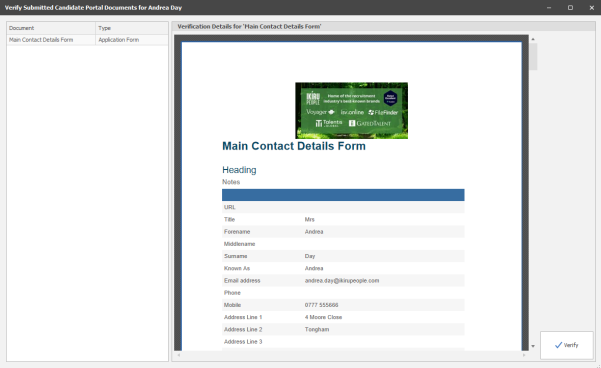
Names, Address and Contact details are pre-populated from the data stored in Infinity.
Mandatory fields
- Are set per document, when the document is created in the administration screen.
- If the candidate submits a document with mandatory fields not populated:
- They are taken to the first field that needs populating.
- All fields that fail the mandatory check are marked in red.
Save
- If the Application Form is partially populated, but not ready to be submitted, it can be saved on the portal
- When the Application Form is submitted, the saved data is removed from the portal, and the submitted document sent to Infinity.
- If the Application Form is not submitted, any saved data is deleted after 180 days.
Submit
- When finished, the Application Form can be submitted
- If the candidate wishes to keep a copy, they can click ‘Download a copy’ before they press submit, and a copy will be downloaded.
- This option may be set as mandatory
- Once they are submitted:
- They cannot be viewed or changed
- They display a green tick.
Candidate Portal – References
To open references, click on the document from the onboarding page
- A list of the required references are displayed, and any specific types that are required
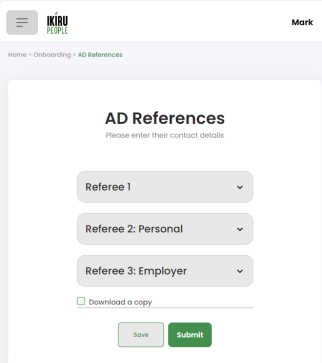
- Each reference can be expanded to populate the details
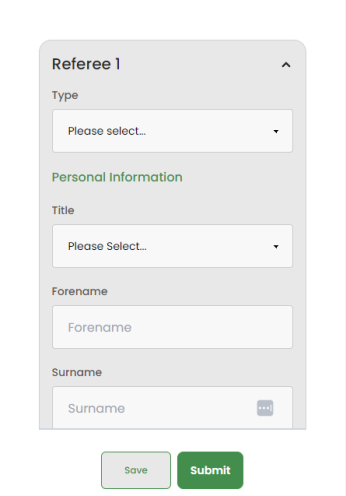
As per the admin configurations, the candidate must populate:
- A specific number of references
- A specific number of Employer references
- A Specific number of Personal references
Mandatory fields
- Reference type (Employer or Personal)
- Surname
Save
- If references are partially populated, but not ready to be submitted, they can be saved on the portal.
- When the Reference is submitted, the saved data is removed from the portal, and the submitted document sent to Infinity.
- If the Reference Form is not submitted, the data is deleted after 180 days.
Submit
- When finished, references can be submitted
- If the candidate wishes to keep a copy, they can click ‘Download a copy’ before they press submit, and a copy will be downloaded.
- This option may be set as mandatory
- Once they are submitted:
- They cannot be viewed or changed
- They display a green tick.
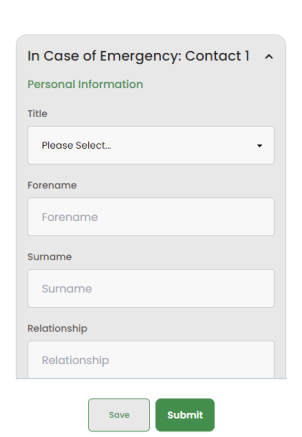
Candidate Portal – ICE (In Case of Emergency)
To open an ICE (In Case of Emergency) document, click on the document from the onboarding page.
- A list of the required ICE Contacts are displayed.
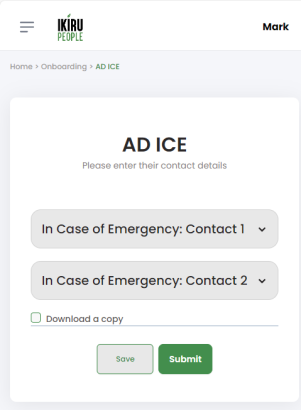
- Each ICE Contact can be expanded to populate the details.
As per the admin configurations, the candidate must populate:
- A specific number of ICE Contacts
Mandatory fields
- Surname
Save
- If ICE Contacts are partially populated, but not ready to be submitted, they can be saved.
Submit
- When finished, ICE Documents can be submitted
- If the candidate wishes to keep a copy, they can click ‘Download a copy’ before they press submit, and a copy will be downloaded.
- This option may be set as mandatory
- Once they are submitted:
- They cannot be viewed or changed
- They display a green tick.
Candidate Portal – Sign Document
To open a Sign Document, click on the document from the onboarding page

- The Document is displayed or/downloaded depending on the phone/browser type you have.
- If the document has been configured for a signature, candidates can sign in the white box.
- This must be populated before it can be submitted.
- If the document has been configured for a tick box, click the tick box.
- This must be populated before it can be submitted.
- Submit
- When finished, Sign Documents can be submitted
- If the candidate wishes to keep a copy, they can click ‘Download a signed/ratified copy’ before they press submit, and a copy will be downloaded.
- This option may be set as mandatory
- Once they are submitted:
- They cannot be viewed or changed
- They display a green tick.
Candidate Portal – GDPR Consent Document
To open a GDPR Consent Document, click on the document from the onboarding page

- The Document is displayed or/downloaded depending on the phone/browser type you have.
- If the document has been configured for a signature, candidates can sign in the white box.
- This must be populated before it can be submitted.
- If the document has been configured for a tick box, click the tick box.
- This must be populated before it can be submitted.
- Submit
- When finished, GDPR Documents can be submitted
- If the candidate wishes to keep a copy, they can click ‘Download a signed/ratified copy’ before they press submit, and a copy will be downloaded.
- This option may be set as mandatory
- Once they are submitted:
- They cannot be viewed or changed
- They display a green tick.
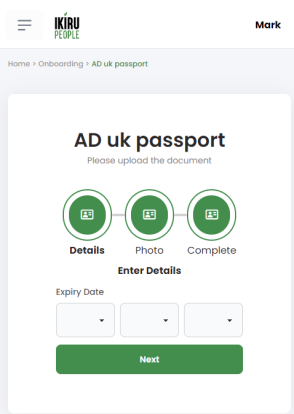
Candidate Portal – Upload Quals & Certs
To open an Upload Quals & Certs Document, click on the document from the onboarding page
- If configured to enter an expiry date, enter the date, and click ‘Next’
- Click ‘upload image’
- On a computer you can select from the file system
- On a phone/tablet you can select
- Photo Library
- Take Photo
- Choose File
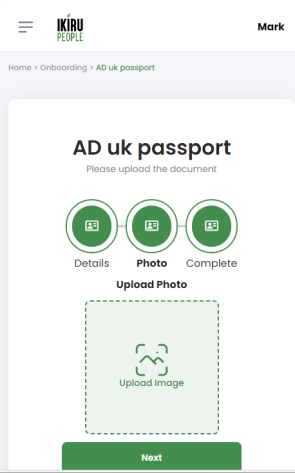
- The photo/scan can edited if required, to select/take another photo
- If multiple quals & certs are required, the above steps can be repeated.
- Submit
- When finished, Quals & Cert Documents can be submitted
- The files must conform to the maximum upload size, (typically 8M)
- Supported file types include JPG, PNG, GIF
- Unsupported file types include EXE, DOC, DOCX, PDF, XLSX
- Once they are submitted:
- They cannot be viewed or changed
- They display a green tick.
Candidate Portal – Upload Driving Licence
To open an Upload Driving Licence Document, click on the document from the onboarding page
- If configured to enter a driving licence number, enter the number, and click ‘Next’
- Click ‘upload image’
- On a computer you can select from the file system
- On a phone/tablet you can select
- Photo Library
- Take Photo
- Choose File
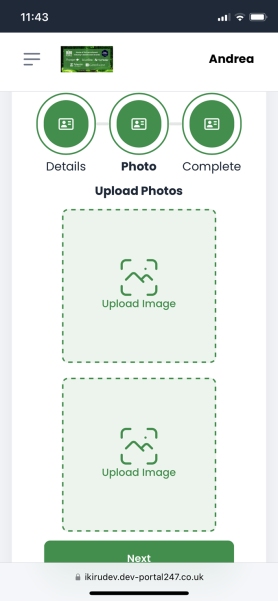
- The photo/scan can be edited if required, to select/take another photo
- Submit
- When finished, Driving Licence Documents can be submitted
- The files must conform to the maximum upload size, (typically 8M)
- Supported file types include JPG, PNG, GIF
- Unsupported file types include EXE, DOC, DOCX, PDF, XLSX
- Once they are submitted:
- They cannot be viewed or changed
- They display a green tick.
Candidate Portal – TrustID / Legalesign
TrustID and Legalesign documents are displayed for information purposes only.
- When the TrustID and/or Legalesign process is completed they will be automatically marked as submitted.
- LegaleSign may take up to 4 hours to update
- TrustID typically updates within 1 hour, but may take up to 24 hours.
Candidate Portal – Info Document
Info documents are displayed for information purposes only.
- When the process is completed, the consultant will need to verify the document, for it to be marked as submitted.
Candidate Portal – View Document
To open a View Document, click on the document from the onboarding page
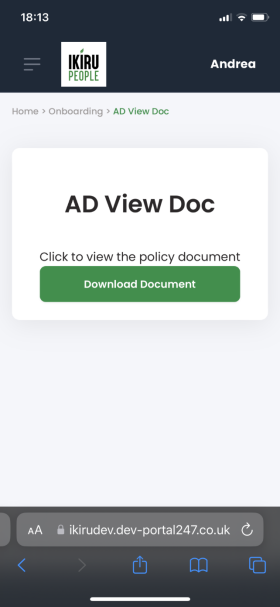
- The Document is displayed or/downloaded depending on the phone type you have.
- In future versions, this will be changed to a ‘Download Document’ button for all phone types (shown above).
- View Documents do not require to be submitted
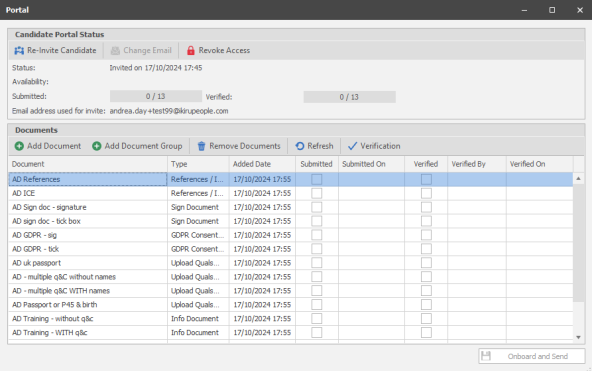
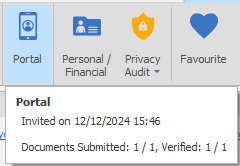
Infinity Candidate Page – Submitted / Verified Documents
From the candidate page, you can see how many documents have been submitted, and how many have been verified

- ‘View Documents’ are not included in the count, as they are not submitted or verified
You also see a list of documents, including submitted date/time and verified data/time/consultant
A tooltip is also available from the candidate page toolbar button.
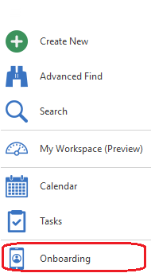
Onboarding Grid
The Onboarding grid lists candidates configured for Onboarding.
The onboarding grid is available from the application menu.
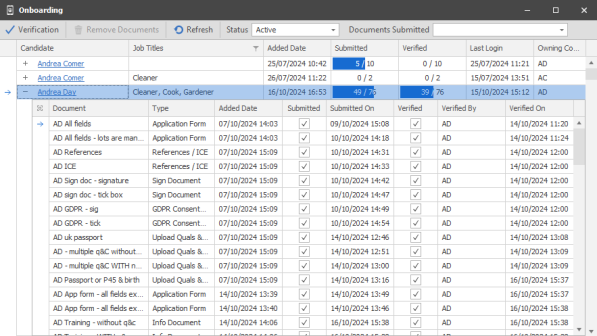
For each candidate you can see:
- Added Date
- The date the latest document was added to the candidate
- How many documents have been submitted
- ‘View Documents’ are not included in the count, as they are not submitted or verified
- How many documents have been verified
- ‘View Documents’ are not included in the count, as they are not submitted or verified
- Last Login Date
- Candidates owning consultant
You also see a list of documents, including submitted date/time and verified data/time/consultant
Various options are available from the toolbar:
Verification
- This initiates the verification process for the candidate. (See Below)
- All documents except ‘View Document’ can be verified
Remove Documents
- Documents can be removed
- It is recommended that submitted documents are verified before they are removed
- Users require the ‘Onboarding Document Delete' permission to remove a document. (infinity users security roles are not given this permission by default)
- An event is logged when documents are removed
Refresh
- The documents can be refreshed
Status:
- Active (Default)
- All candidates invited for onboarding who have not completed the process
- Required Verification
- All candidates who have at least one document that requires verification
- This includes all info documents
- Closed
- All candidates who have all their documents verified
- This excludes ‘View Document’ which does not require verification
Documents Submitted
- When documents are selected, only candidates with the selected documents submitted are displayed.
My Infinity – Requires Verification
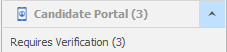
My Infinity is similar to the Application Menu Onboarding grid but only shows those that ‘require verification and candidates who are owned by the consultants.
Verify – General

- The details the candidate populated are displayed
- Documents with large images attached may take longer to display.
- If the details are correct and you wish to add them to the database, click ‘Verify’
- The data is added to the relevant section of the candidate page
- The details the candidate populated are also added as an attachment to the candidate page
- The relevant attachment type is used, if configured.
- If you are verifying from the Onboarding grid, the candidate page must be closed.
- If you are verifying from the candidate page, the candidate page automatically refreshes when the verification window is closed.
- Only one user can verify a specific candidate at the same time i.e. If one user is verifying candidate Andrea Day, another user cannot enter the verification screen for Andrea Day.
- Verifying some documents requires all other users to be out of the candidate record, or the user will be informed that the candidate is locked.
- Application forms and Upload documents require exclusive use of the candidate.
- Other documents don’t require the lock because they are adding extra rows to grids that will not conflict with changes another user could be making.
- If Mid Office (MO) is enabled, a warning appears on the verify screen if the candidate has been sent to MO
- Any changes made to fields that are owned by MO will not be updated in MO,
- We recommend that all fields used in Application forms are owned by Infinity, if Onboarding documents are filled in after placements are created.
- Users require the ‘Onboarding Document Verify’ permission to verify a document. (infinity users security roles are given this permission by default)
- When the last document is verified, an event is logged

Note: If the document is not verified because the consultant/compliance are not happy with what the candidate has submitted, the document can be allocated to the candidate again, which will require the document to be completed again.
Verify – Application form
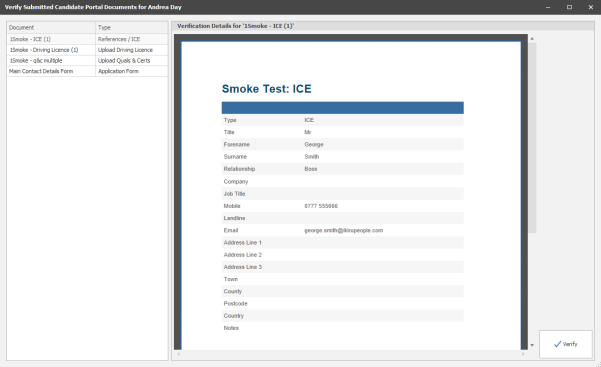
Verify – References / In Case of Emergency (ICE)
Verify – Sign Doc

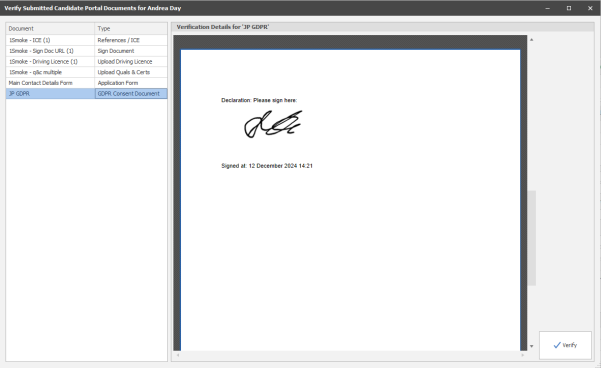
Verify – GDPR Consent Document
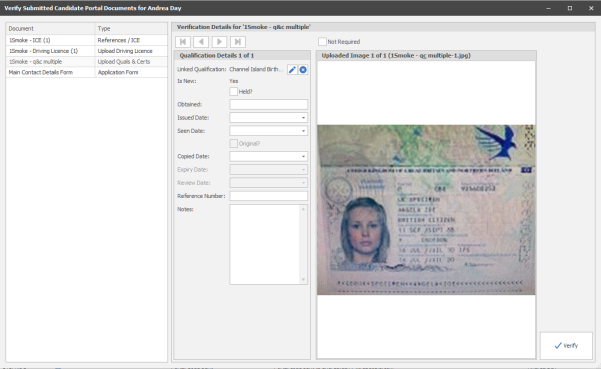
Verify – Upload Quals & Certs
- Quals & Certs have a grid for each Quals & Cert uploaded
- Data populated by the candidate e.g. expiry date, is populated first.
- If the quals & certs already exists on the candidate page, the other fields properties of the quals & cert are populated from the candidate page
- If the name of the quals & certs is changed, all the field are reloaded using the same rules, but with the new quals & cert.
Verify – Upload Driving Licence
Verify – TrustID
- The TrustID process works independently of the Portal, and the candidate page is updated as appropriate when the data is returned from TrustID.
- TrustID documents must be verified to complete the onboarding process, although no data is changed when it is verified, except to mark the document as verified.
Verify – Legalesign
- The Legalesign process works independently of the Portal, and the candidate page is updated as appropriate when the data is returned from Legalesign.
- Legalesign documents must be verified to complete the onboarding process, although no data is changed when it is verified, except to mark the document as verified.
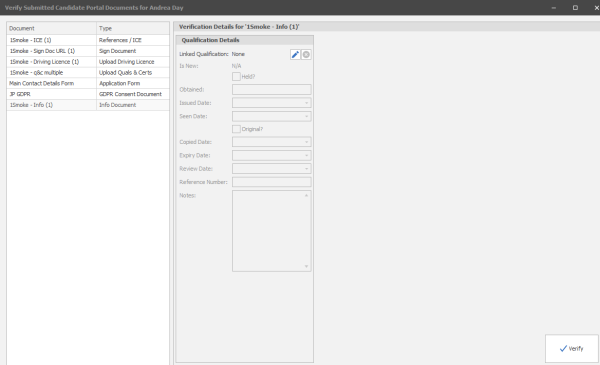
Verify – Info Document
- The info doc can be linked to a quals & cert, which is automatically populated on the verify screen, as per the quals & certs upload.
- The info doc does not have to be linked to a quals & cert, for it to be verified.
Verify – View Document
- View documents do not appear on the list of documents to verify
- View documents do not need to be verified because they are just for the candidate to ‘view’ them if they wish.
Revoking access
- A candidates access to the portal can be revoked
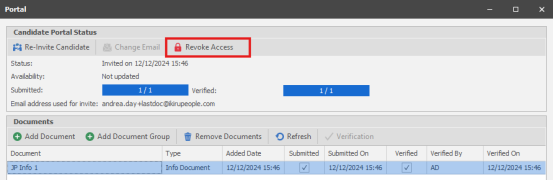
- The candidate page toolbar indicates it the candidate is revoked

- Access can be restored if you want to give the candidate access again.
Changing an email address
- If the candidate changes their email address, a message appears

- A new portal invite email is automatically sent by the Candidate Portal once the candidate is saved.
- The candidate will need to use the link in the email to finish the portal registration at the new email address.
- Alternatively, If the candidate has two email addresses, and you need to change the one that the portal uses, click ‘Change Email’
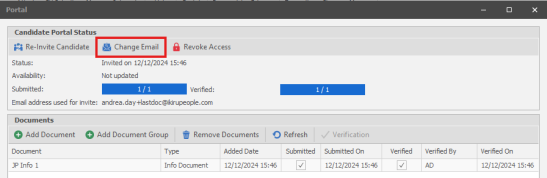
- A new portal invite email is automatically sent by the Candidate Portal once the candidate is saved.
- The candidate will need to use the link in the email to finish the portal registration at the new email address.
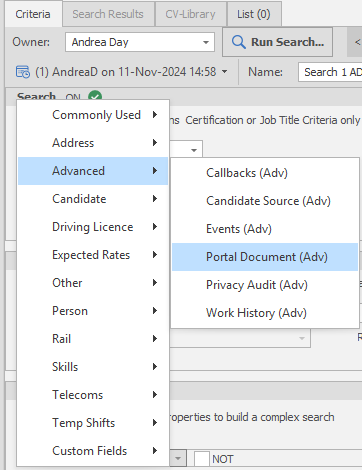
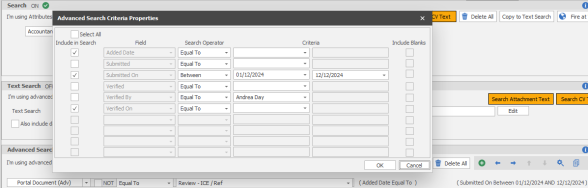
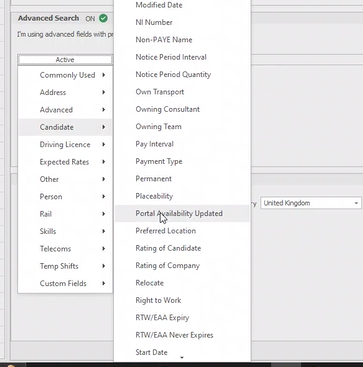
Searching Infinity
- You can search for candidates who have a specific portal document allocated to them.
- You can also search properties of those documents
- e.g. search for candidates who submitted an ICE document within a certain date range.
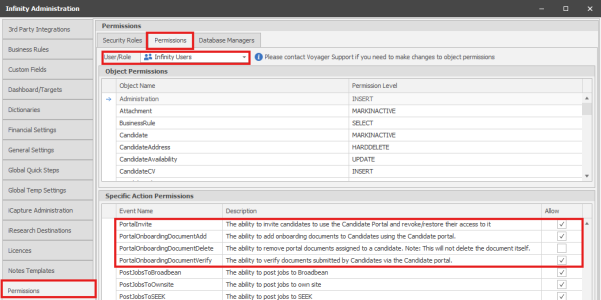
Permissions
4 portal permissions control consultants' ability to interact with the portal:
- Portal Invite
- Portal Onboarding Document Add
- Portal Onboarding Document Delete
- Portal Onboarding Document Verify
Reminder Emails
- The Portal can be configured to send reminder emails
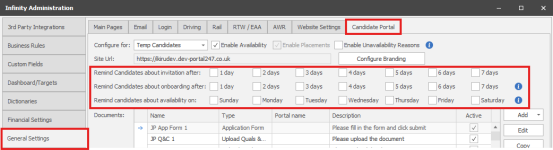
- Invite Reminder: If the candidate is invited, but has not logged in, the portal will send an invite reminder on the selected days, for the first 7 days.
- Invite Reminder: If the candidate has logged in, but not populated all their onboarding documents, the portal will send an onboarding reminder on the selected days, for the first 7 days.
- If the candidate has not logged in, the onboarding reminder is not sent, and the invite reminder is sent.
- Availability Reminder: The portal can be configured to send an availability reminder every week on selected day or days.
- When enabled, all portal candidates who haven’t updated their availability within the last 7 days will receive the availability reminder email on the selected day(s), including those who are yet to login.
- Reminder emails are sent early in the morning, the day after the invite email
Scheduled Maintenance
- Typically, once every 4 weeks Infinity is upgraded.
- While an individual database is being upgraded the Portal will not be able to communicate with Infinity.
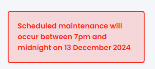
- The candidate will see a maintenance message during the database upgrade.
- On the day of the upgrade candidates will see a message giving them advanced warning of the upgrade.
- If a candidate submits an application form or a reference document during an upgrade, the document will be automatically saved, and the candidate will be aware that the document has not been submitted.
Temp Availability – Currently released to Beta customers only
- Temp Availability / Unavailability is entering Beta testing and is likely to be released in early 2025.
- Temp candidates can mark themselves as Available/Unavailable per day, and the data is added directly to Infinity
- Availability does not need to be verified
- Availability is automatically updated in the planners, when updated by a candidate
- Temp Unavailability can be configured to have a reason if required
- Not all Infinity unavailability reasons are available to the portal
- Portal Unavailability reasons are configurable
- You can search for candidates who have updated their availability via the portal
Enhancement 130917 Leads – status changes controlled by a button on the toolbar
The status field shown on the right-hand side lead page is no longer editable.
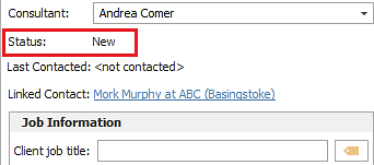
Instead, a drop-down button is available on the Lead’s toolbar to set the status of the selected lead record.
![]()
- The button is inactive if multiple leads are selected
- The drop-down list shows all statuses other than the lead's current one
- Functionality works the same as per previous versions where status was controlled by the field on the page only – e.g. qualifying a lead that is not linked to a contact will launch the linking wizard.
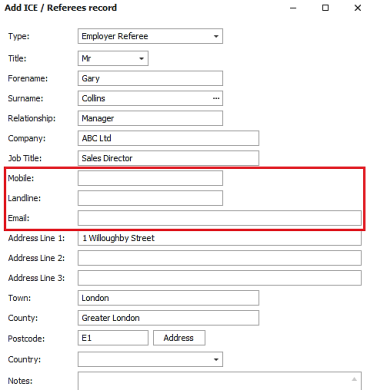
Enhancement 130385 Candidate referee field order has changed
In the candidate page referee screen, the telecom fields (mobile, landline, email) have been moved above the address fields.
Enhancement 130954 Creating attachment types in admin warns to assign to a page
In Administration / Reference Data / Attachment Types tab, the user must tick at least one page when creating or editing an attachment type.
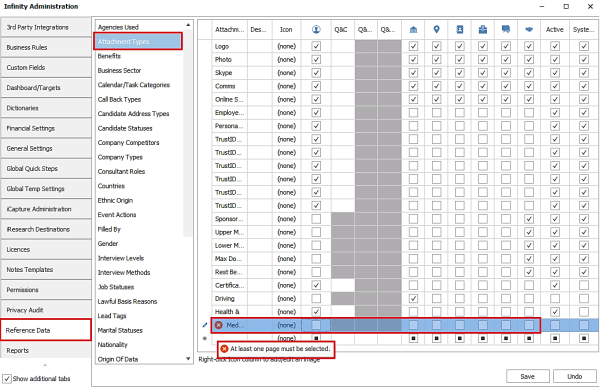
This makes the attachment type available in the attachments area of those pages, e.g. candidate, job.
Enhancement 130929 User's sessions are closed when failing multi-factor authentication
When a user cancels out of, or fails the multi-factor authentication login process, their Infinity session is closed and does not use a licence.

If you require further assistance please contact Ikiru People using the details published on www.ikirupeople.com
Visit our Customer Portal at https://portal.ikirupeople.com/ for future events and clinics.
If you would like to make suggestions or have found any errors with this Help section please contact our Support team.
Version 4.87
Voyager Software is a brand of Ikiru People Ltd, a subsidiary of Dillistone Group Plc. The group is a leading global provider of software and services that enable recruitment agencies and in-house recruiters to better manage their selection process and address the training needs of individuals. Across its brands – which include Voyager Software (recruitment software UK & Australia), Dillistone FileFinder executive search software, GatedTalent, the global database of the world’s leading executives, Talentis.Global – the next generation of recruitment software and also ISV.Online, provider of online pre-employment skills testing and training tools. Dillistone Group serves thousands of clients worldwide. Ikiru People Ltd: Registration Number 02043300. Registered in England & Wales.
 |  |  |  |